Boss Breakdown: Dark Mantis from Mega Man X8

Boss breakdown again! It’s been a while. What’s a boss breakdown? It’s a design exercise. I try to break down, to the fundamental particles, what makes up a boss fight, how its design operates under the hood, and analyze the result. Design goals, what the design accomplished, the whys, the hows, and everything between.

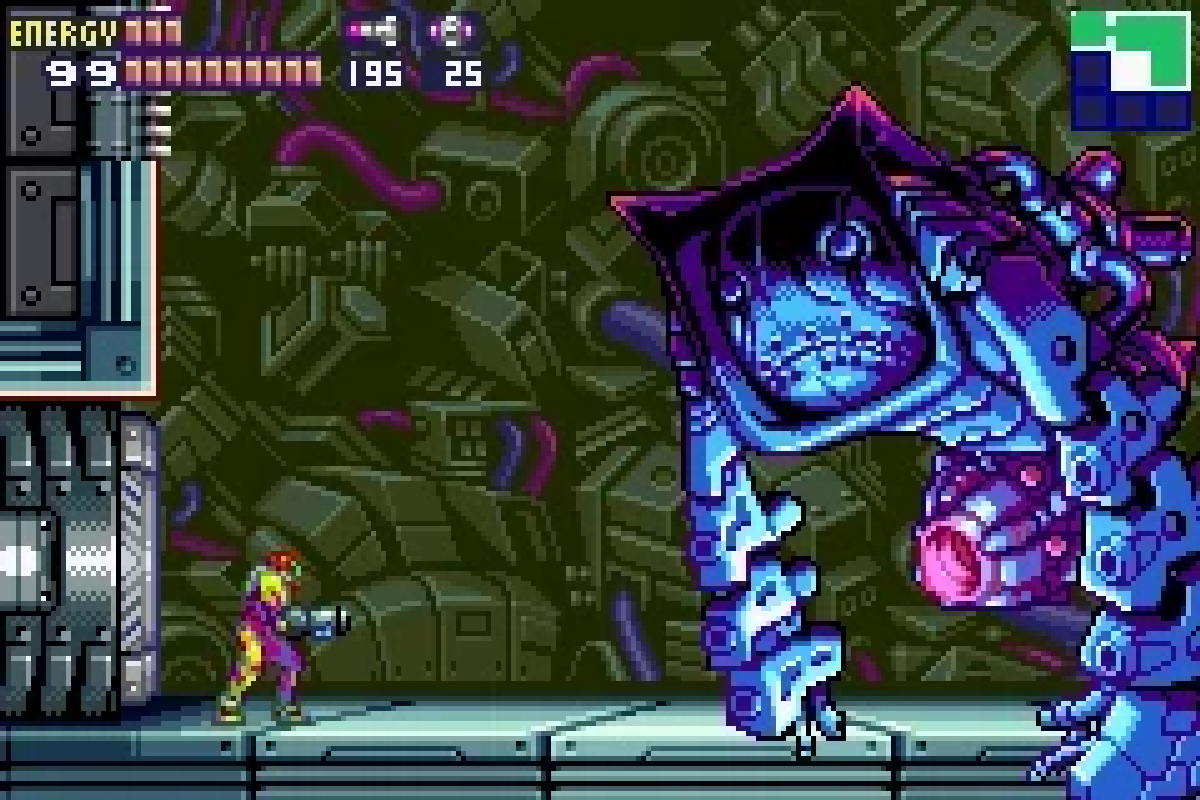
For this boss breakdown I want to do something a little different. I’m going to compare two versions of the same boss fight. The boss I’m going to break down is Dark Mantis from Mega Man X8 for the Playstation 2. Interestingly, one of the versions is a fan-made recreation, meant to be evocative of the 16-bit classic Mega Man X games. This ‘demake’ in question is being developed by one AlyssonDaPaz. I played a lot of this game when I was a kid, and I have fond memories of it. On balance I’d say it’s a pretty good game, but it is far from the best of the Mega Man or even the X series. It was the first game in the series following the less-than-fondly-remembered Mega Man X6 and Mega Man X7, which are both… extraordinarily flawed, each in their own way. Maybe I’ll talk about those one day. My point is that X8 was a case of the franchise trying to re-find its footing after a rough patch, and as only the 2nd ever 3D game of the main series Mega Man games, it was still experimenting on how best to leverage these new capabilities with a classic formula. The ‘demake’ Dark Mantis has no such baggage nor extant goals. The fascinating thing about fan remakes and demakes like these, I think, is how they are inherently made with the benefit of hindsight, and the added context of being made by someone a fan – a distinct perspective that colors how the design is approached.

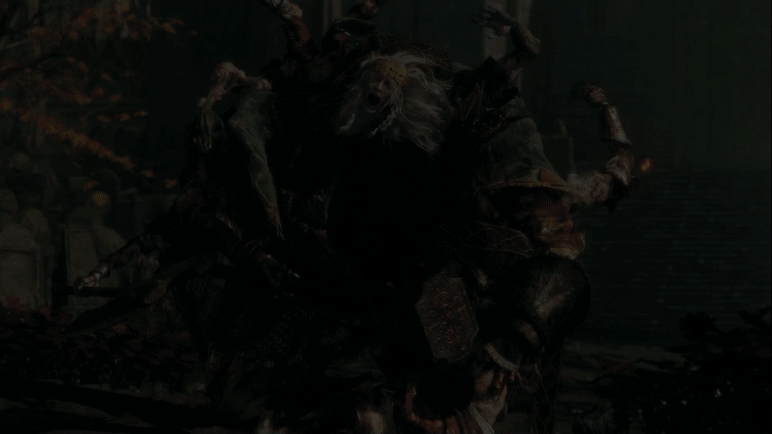
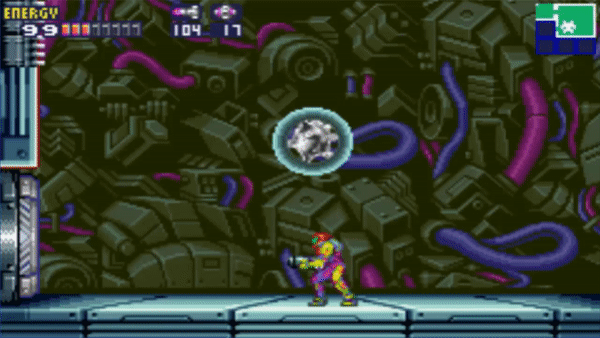
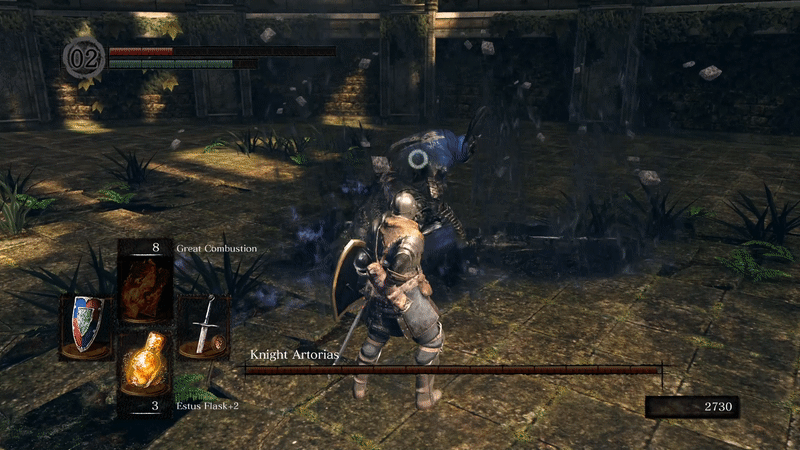
Dark Mantis, narratively, is an assassin-type robot modeled after a praying mantis with blades attached to his arms. He skulks about in the dark for a quick, clean kill. So, a lot of his design is going to reflect that. He has a lot of fast, sudden movements to reflect this. In the original, he has two basic behaviors – hopping back and forth a short distance on the ground, from which he will react with an attack based on player-proximity, and his second behavior; jumping back and forth across the top of the screen, from wall to wall. In the demake, his hopping behavior, which characterized Dark Mantis as very cautious and careful, looking for the opportune moment to strike, has been removed. In the practice the hopping behavior slowed the pace of the fight, leaving the player more room to breathe. This reflects the design philosophy of most of the bosses of Mega Man X8, none of which are extraordinarily fast pace. In the demake, Dark Mantis is basically always attacking, with very little downtime between each attack routine. This characterizes him more as a merciless, vicious killer that dispatches his opponents quickly and efficiently. If you want my opinion, the demake does, with the benefit of hindsight, characterized the mantis better through his design – more accurately matching his written dialogue and descriptions as presented.

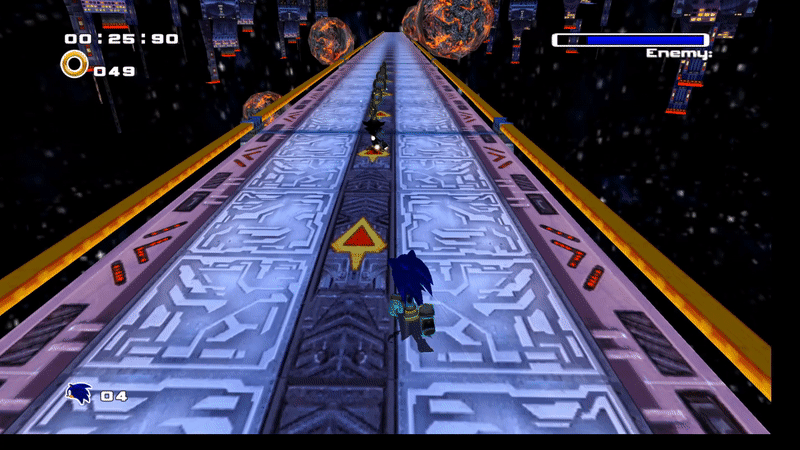
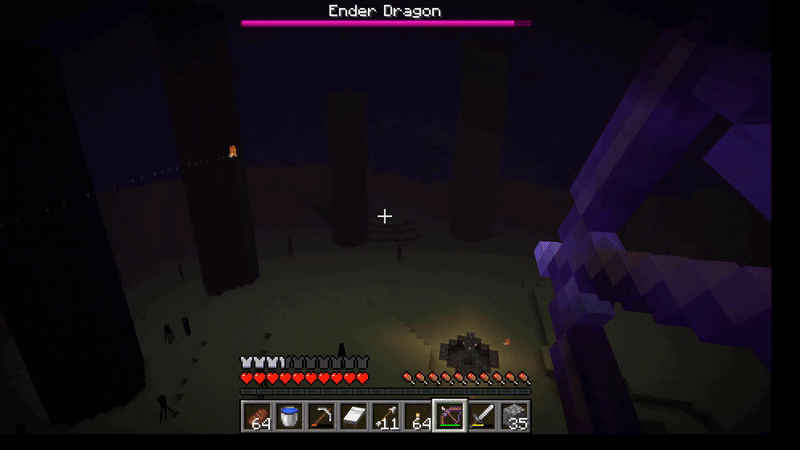
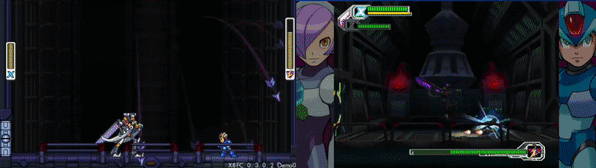
He still bounces between the top corners of the screen by clinging to walls, but this has been altered in the demake. In the original, this behavior would keep the player away of their relative position on the ground and discourage abusing the walls to avoid attacks too easily, and Dark Mantis would otherwise have trouble hitting players hiding in those top corners. Forcing the player to the ground also encourages them into close proximity – appropriate for this more melee-oriented boss fight. The demake version fills this some purpose, but also includes the fan version’s first new attack not present in the original. Dark Mantis will, after one or several hops, drop straight vertically out of the air, bearing his blades down when he is exactly above the player. So the player must not only be aware of their relative position on the ground, but the number of hops Dark Mantis has done, and otherwise be prepared to react with a dash to dodge out of the way. This adds a sense of tension to the behavior that the original did not have. While in the original you did not know when Dark Mantis would drop from the wall, you could always preemptively move to the opposite wall. There is no such option with his plunging attack, so the player must always be prepared to react.

The same scene plays two times, side by side. The left is a pixel-art version, the right is a PS2-era 3D version. A dark robotic mantis fights the blue android Mega Man X in a dark generator room. On the left, Dark Mantis hops from wall to wall, then plunges his blades into the ground. On the right, Dark Mantis hops back and forth on the floor, then throws a black energy projectile.

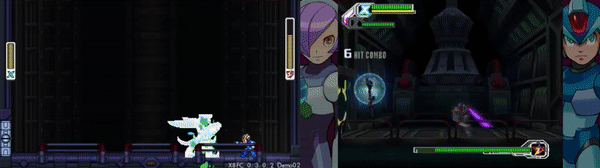
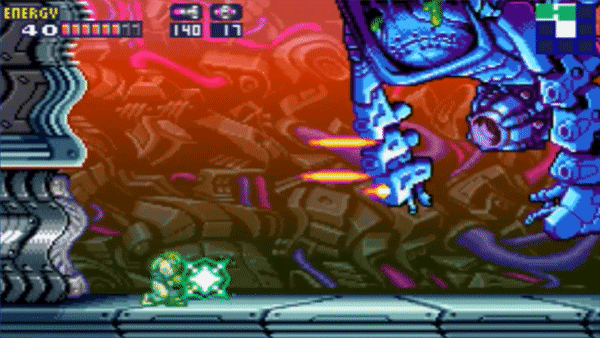
Left: Plunging Attack, Right: Shadow runner

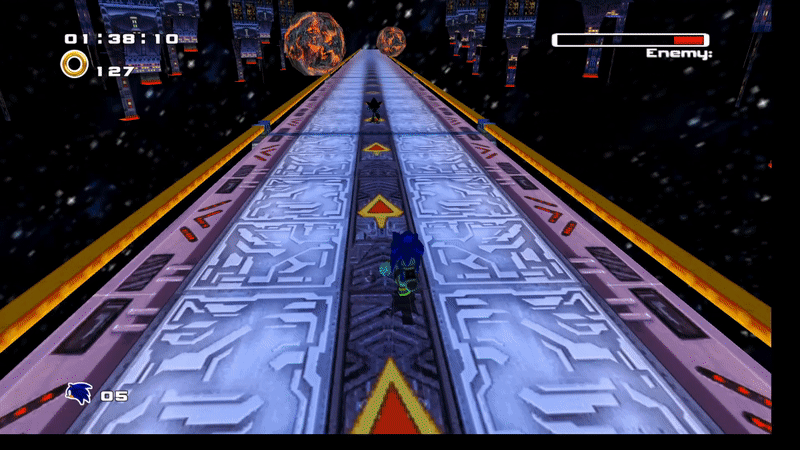
Shadow runner is an attack that is in the original and not the remake. Which is ironic, seeing as how in the original, Shadow Runner is one of the attacks the titular X can copy from Dark Mantis after he is defeated. What it does, is produce a shadowy arrow projectile that travels horizontally, then spins outward when it reaches a close proximity to the player. This gave Dark Mantis an extra ranged option, to cover for his more melee-focus. It’s easily dodged though, by jumping over or dashing under it. It’s removal from the demake makes sense, as Dark Mantis is given an even more keen melee focus, and he much more aggressively forces the player into close proximity with him, making Shadow Runner kind of redundant. 

The same scene plays two times, side by side. The left is a pixel-art version, the right is a PS2-era 3D version. A dark robotic mantis fights the blue android Mega Man X in a dark generator room. On both sides, Dark Mantis attempts to grab X, who moves out of the way at the last moment.

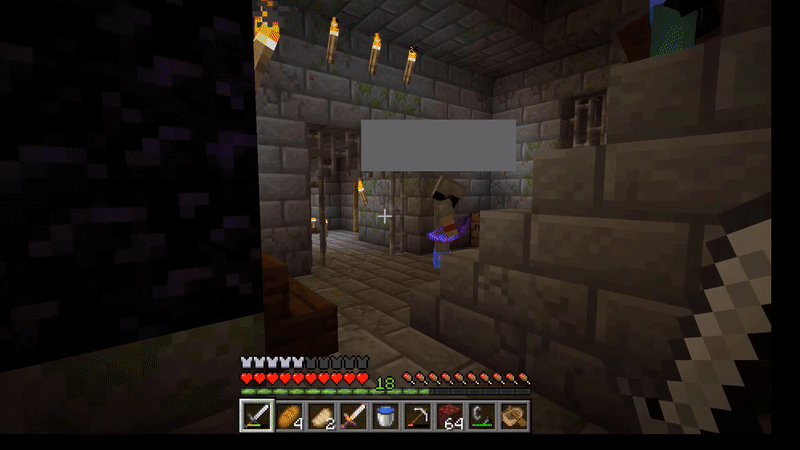
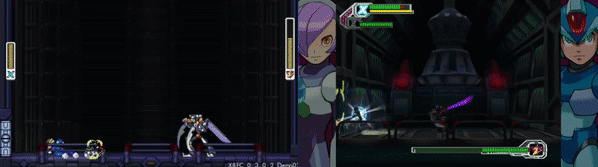
Aside: The animation and sprite work on this fan game is just gorgeous.

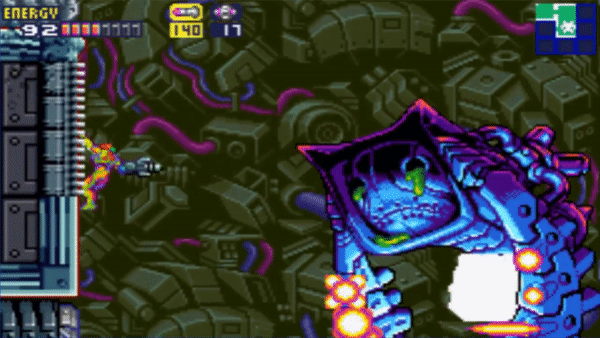
Next, we have Blood Scythe, which works a bit differently between versions. The original  has Dark Mantis travel a set distance forward in a fast dash when the player is close enough in front of him. He may hop into this range, or the player may enter it to trigger. To dodge the player simply has to dash or jump out of the way fast enough, or else be restrained by Dark Mantis. While restrained, the player will take a small amount of damage, but Dark Mantis will have his hp restored slowly in turn, making this a highly punishing attack. This serves the purpose of making the player always away of Dark Mantis’s proximity to them. He is meant to be deadly up-close with those plays, so this attack reinforces that idea. In the original the attack can be ended early by using the assist mechanic, in which one of the player’s two controlled heroes assists the other to escape, and takes his place in the action. The demake understandably removed this mechanic, and multiple playable characters in general, presumably for simplicity and scope reasons. There is another notable difference to the demake’s blood scythe and that is its movement. Its lateral movement is now slower, but will travel however far is necessary to reach the player, before initiating the grab.

The same scene plays two times, side by side. The left is a pixel-art version, the right is a PS2-era 3D version. A dark robotic mantis fights the blue android Mega Man X in a dark generator room. Dark Mantis lifts his scythes up and dashes at X, grabbing him and sucking out his energy. On the right, another android appears to free X.

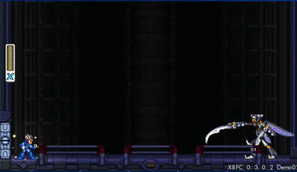
Ah yes, praying mantises, well known for… sucking blood? Robot blood?

This ties into another new attack added in the demake. When Dark Mantis is on the ground and detects the player is also on the ground, he may choose to initiate one of two attacks and move him across the entire arena from his current position until he reaches the player or a wall. In the first is bloodscythe, the second is close-ranged a slashing attack. Relatively, bloodscythe has a lot more startup time and moves slightly slower than the slash. He assumes two very different poses depending on which he will initiate – raising both blade arms for bloodscythe, and moving one blade to his hip in a low stance for the slashing attack. In many cases in Mega Man X game it is the player’s instinct to dash and jump to dodge attacks – as most attacks do not cover a wide area, this offers the most vectors of escape; up and away. It takes a good amount of discipline and conscientiousness to resist this impulse, which is what the slashing attack demands. Dark Mantis propels himself with the slash just high enough into the air that it can be dodged if the player is in a dash state, in which their hitbox is shorter. If they also jump, obviously they will be struck. Dashing and jumping is the optimal strategy to avoid bloodscythe, but not the slash. This new dynamic introduced to the fight ensures the player has to keep their eyes on Dark Mantis and watch for his tells.

A dark robotic mantis fights the blue android Mega Man X in a dark generator room, all rendered in 16-bit pixel art. Dark Mantis readies an arm blade, and dashes across the enter length of the arena floor, then jumps and slashes X as he approaches. X ducks and dashes at the last second.

This animation on this attack is really well done – dynamic and threatening.

This forms a new core identity to the demake version of Dark Mantis. The slashing attack and bloodscythe become two of his most common attacks, and thus represent an ever present threat that demands skills of reflex, observation, and control. The slashing move is then followed by a short-ranged projectile that can be dodged easily enough, but adds to the complexity of the move as something you still need to be aware of.

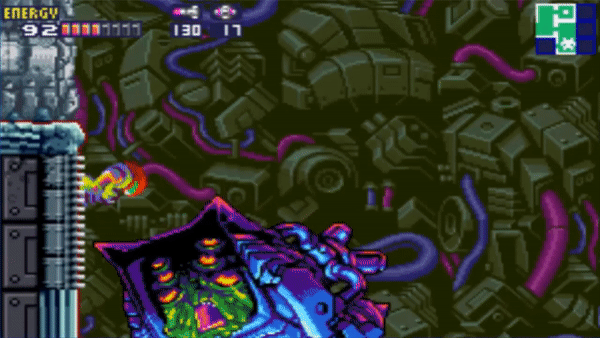
Finally there’s the attack black arrow. It’s a spray of projectiles that launch up, and in an arc, spreading out as they go, then coming down on the position the player was in when they were launched. To dodge, anticipate where the arrows will fall, and stand in the safe gaps between them. The in demake, this further serves as a sort of misdirection. Because Dark Mantis has so little down time between attacks, his black arrow becomes a kind of provurbial smoke screen to draw player attention away while he prepares his next move. Black arrow is very similar between the versions, but demake Dark Mantis’s black arrow attack is a lot easier to see, in general. That makes it easier to dodge, but also less frustrating to deal with in general. 

Something black arrow draws into focus is the fight’s readability. Readability is essential for fast-paced action games like Mega Man. If the game is all about spatial relationships, reaction, and timing, the player’s got to see what they’re reacting to and time, and where it’s coming from, right? Now, the intentional obscuring of information like where a projectile is at any given time can be leveraged for an extra change of pace and challenge, which I presume is what the original X8 was intending, but this can very easily become frustrating. You see, each level in Mega Man X8 has some sort of unique level mechanic or gimmick, to distinctify the stage. This could have been done for any number of reasons. It’s possible it was just to give the game its own signature style compared to other Mega Man games, or it could’ve been done to broaden the game’s appeal to a more general audience, or for any other reason. In Dark Mantis’s stage, the gimmick is a generator that, when activated, turns on all the lights in the dark, shadowy level. This includes a light in Mantis’s own boss room. In light, he’s much easier to see. 

The same scene plays two times, side by side. The left is a pixel-art version, the right is a PS2-era 3D version. A dark robotic mantis fights the blue android Mega Man X in a dark generator room. Dark Mantis throws several black arrows up. They then arc as they fall, leaving behind purple trails. X walks out of their trajectory.

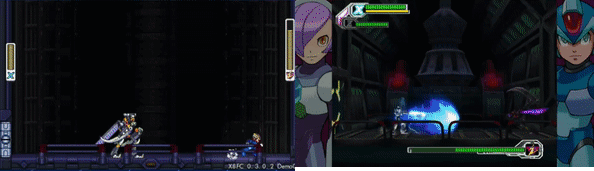
Side by side like this, its easy to see which version is *much* more readable.

Even with the light though, demake Dark Mantis is just a lot easier to see. This is a side effect of him being a 2D sprite. 2D sprites are a lot easier to make readable than 3D. The artistic techniques necessary to make 2D art readable are less system-dependent as well. 2D sprites can have definite outlines without need of external program scripts, for instance.  For a further example of what I mean, consider that 2D Dark Mantis is not lit by any particular source of light in the room. He has shading, but it is general purpose – meant to look good from any position in the room in which he appears. His body catches light as illustrated, but not from any particular angle. With this in mind, 2D sprites do not have to have the same relationship of color and light to their background as 3D models do to look natural. Demake Dark Mantis is actually a lot brighter on the screen than his shadowy background may imply – he actually consists of mostly mid-tones – but it doesn’t look jarring. That contrast does make him highly readable at a glance, though. 

Original Dark Mantis, on the other hand, has to “blend” more with his environment, or his 3D model would stick out in a jarring way that would seem amateurish. A 3D model’s poses also have to be manually puppeteered, and a 3D model’s anatomy cannot easily be exaggerated the way a 2D sprite’s can to convey the artist’s intended look and feel. 2D drawings can be contorted in ways 3D models can’t to be more readable. 

At this point the difference in direction here is definitely starting to come into focus for me. One of the main things, I think, is difficulty. Mega Man x8, particularly in comparison to other Mega Man games, is not extremely difficult. It’s no pushover, on the harder difficulty settings, but the most critically beloved Mega Man games can be some real killers. The series kind of has a reputation for it, actually, and that sense of intense challenge is a big appeal for a lot of its core audience. 

I’m about to engage in some protracted speculation here.

Something to understand about Mega Man as a franchise: It’s never been a blockbuster seller. Mega Man the character is one of the most famous video game icons, period. Everybody knows Mega Man. The people love him. Thing is, that popularity never especially translated to sales. However, it’s a series with about 50 or so entries, even if you’re counting conservatively. My point is, these are highly technical games with a huge skill ceiling, and an often unyielding skill floor. Some niche, fairly hardcore games, for a niche hardcore audience. They inherently don’t have the same mass market appeal as a Mario, or even a Sonic. This was never a problem for a long time, because these games typically did not cost a great deal to make. Each sequel made extensive use of art assets recycled from the one previous, was made in a fairly short amount of time, and introduced only moderate iteration along the way. 

Mega Man games were fast turnaround, low risk, with a loyal and devoted audience of hardcores. That is, until 2D games started to temporarily lose popularity in the advent of 3D graphics. It didn’t seem temporary at the time, though. Here’s the speculation: 3D games are comparatively very expensive to make. If Mega Man were to survive, it’d need to establish a broader market appeal. And so, the two 3D games in the main Mega Man series of platformers, are also known for being quite a bit less refined in terms of skill investment, and a bit less difficult than the other games. All this to say, I speculate a reprioritization to make these games more generally appealing coincides with their transition to 3D, to make up for the cost of production.

That tangent out of the way, the demake version of Dark Mantis holds no such priorities. This version of the insectoid assassin was clearly made to be more evocative of the very difficult bosses of older Mega Man games, with their zippy movements, narrow dodge windows, and rapid fire attacks. And when I say ‘difficult’ I mean specifically designed to better reward full understanding and leverage of the player’s movement capabilities. This is what the demake version of Dark Mantis has two dash attacks, and a much faster desperation attack. These are meant to further push the player’s understanding of how much distance they can clear quickly, and in what directions that distance can be covered, along with a bit of reaction time testing. 

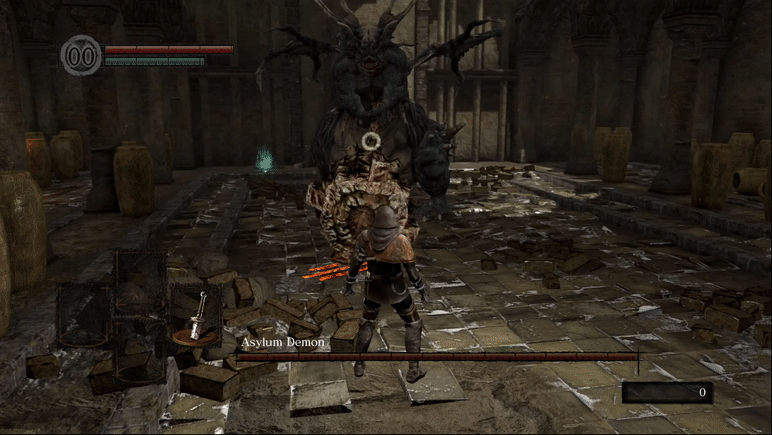
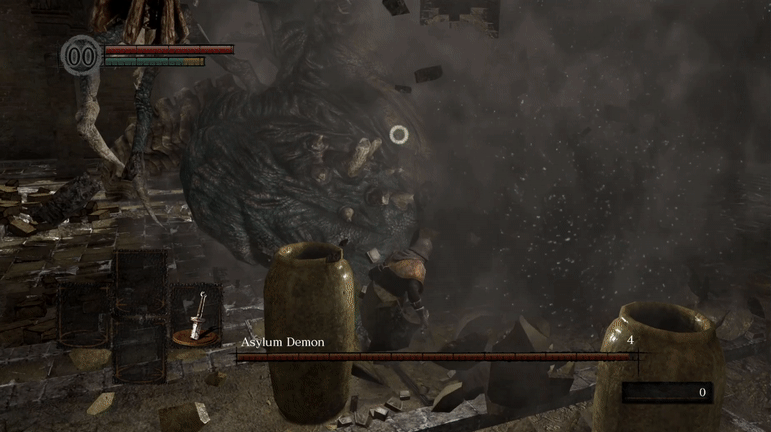
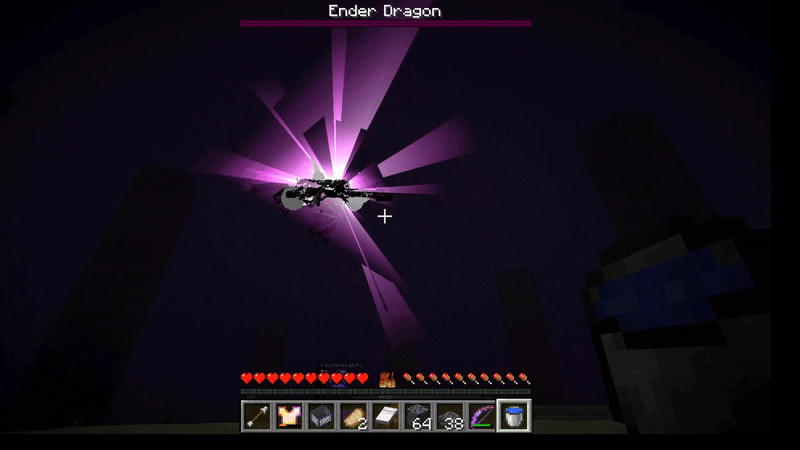
Finally, both versions of the boss share a mechanic whose archetype appears in several games. I tend to call this a ‘desperation attack’, although I believe the official Mega Man is ‘overdrive attack’. It’s a special, rare, extremely powerful and high-spectacle move that fully shows off the boss character’s power, and in theory fully puts the player’s skills and knowledge to the test, as one final high-tension show stopper. This is a new addition with Mega Man X8 and I have to say it’s a brilliant one. These sorts of things offer a lot of opportunity to characterize boss enemies, from their dialogue to their design, and make a fight a lot more memorable, by giving it a real signature and identity. I do have to say though, Dark Mantis has one of the easier overdrive attacks in the original game to deal with. He jumps to, and floats at the top of the screen and arena, then winds up a glowing scythe over one shoulder. A second later, he slashes one half of the arena entirely, dealing massive damage – always the side opposite the windup. He then repeats the attack on the opposite side. This is a really cool attack, conceptually, and from sheer spectacle I really think it does its job of characterizing Dark Mantis and making him very memorable.

The same scene plays two times, side by side. The left is a pixel-art version, the right is a PS2-era 3D version. A dark robotic mantis fights the blue android Mega Man X in a dark generator room. Dark Mantis jumps up to and floats at the top-center of the room, before extending an arm blade to a great length behind his shoulder. He then slashes more than half of the room in one swipe, then alternates to the other side. On the left, he does this several times.

“I wanna see you CRY!”

The demake version once again ups the ante in terms of difficulty and challenge. The attack is basically the same, except the slash is now *even larger*, encompassing more than half of the arena, requiring a well-timed dash jump at a specific angle, and memorization of the attack pattern. That, and he will alternate slashing the left and right halves of the screen several times before his attack is done. This all makes the move much more menacing, and Dark Mantis as a result a lot more impressive, so I have to praise that. I would say it is perhaps a little less reasonable to be able to dodge this move the first go around, compared to the original, and while the enormity of the slashing effect reads perfectly well after the fact, it’s a little tough to predict that will happen if you haven’t seen it before. This is a little harder to work around, as part of the point of this assassination attack is that it has only a very subtle warning compared to its monstrous effect.

As a longtime and very hardcore action platformer(and Mega Man in particular) fan myself, I have to admit my bias for the more challenging, fast-paced Dark Mantis of the demake. I do have to reiterate that remakes and remasters, especially fan-made ones, have very different circumstances and context to the original design. I in no way mean to disparage the very talented folks behind Mega Man X8, they did not have the hindsight and their own game and future games to draw on. I do have to praise AlyssonDaPaz for his impressive work in re-adapting this boss fight for the kind of fan it’s clearly intended for – that is, longtime hardcore Mega Man fans. I think X8 was likely aiming for a broader audience and many of its design decisions reflect that. I hope you found this interesting. I know I always find boss analysis fascinating, and this sort of comparison is a rare and very educational opportunity. I feel like I was able to learn a lot from this.

Your actions are those of a Maverick!

Splatoon’s Salmon Run: Fine-Tuned Machine of Industry

Got Splatoon on the brain, so that’s what I’m gonna talk about today. The game’s preeminent horde mode, added in Splatoon 2, and expanded in Splatoon 3, to be specific, Salmon Run. So essentially I adore Salmon Run, it’s some of the most fun I’ve had with a horde mode in a game, that is, a mode in which waves of enemies hound a team of players in hordes, as the players are tasked with holding them off. In Salmon Run, four plucky young squidkids and octoteens are on the clock to collect golden salmon eggs for their employer. Each run is divided into three waves of increasing difficulty, which can take a number of different forms at random. During each wave, hordes of minor salmonids of a small, medium, and large variety will hound the players, and occasionally larger ‘boss salmonids’ will appear. They are more dangerous and harder to take down, but each drop a number of golden salmon eggs, which then must be carried, one at a time per player, back to a centrally located basket to meet each wave’s quota of golden eggs. Fulfill that goal, and you progress to the next wave. I’m going to go over my perspective on the various elements that make Salmon Run work so damn well. It starts with the maps the game mode takes place on.

A Space Where Moments Happen

Salmon Run maps seem pretty simple on the surface. Smaller than Splatoon‘s versus maps, and usually approximately circle or square shaped. They all hold a few interesting features in common, though. For one, they all feature a large amount of elevation variation. This is important, as most salmonid cannot directly climb walls like players can, and thus will have to path around and through the level’s various ground passages. That’s important too, those passages. The heavily varied elevations create a lot of corridors and enclosed spaces. These enclosed spaces can lead to players getting trapped with enemies, in dangerous situations. That’s the point, Salmon Run maps tend to be less open to facilitate this up-close encounters, to really engage the players with how their enemies move and operate. Strategy becomes essential to keep yourself from being cornered. All this creates exciting ‘Moments’ of high action, that keep Salmon Run interesting.

Speaking of being cornered. Ever notice how all the Salmon Run maps are similarly shaped? Specifically I mean, if we are to assume they are basically the shape of a square, then three of their ‘sides’ are always exposed to the water, where salmonid always spawn from. The fourth side, is not.

This will cause salmonid, again always approaching from the beachheads, to surround players as they navigate, but never directly from behind, as that would feel unfair. So the minor salmonids; tiny small fry, player-sized chums, and larger imposing cohawks, all walk toward players at a moderate speed, usually in lines and clumps, then try to melee attack. The damage dealt by each, and the damage each can incur before being dispatched is proportional to their size. It might be one’s inclination to largely ignore the unruly masses and focus solely on bosses, but this would be a mistake, especially as that aforementioned difficulty scale begins to skyrocket. There is one wall for players to back up against in the face of the coming forces, but they also must keep an eye out for flankers, constantly. peripheral attention becomes essential. Reacting for flanks is another of these exciting ‘Moments’. Waves of high danger follow waves of control, forming Salmon Run’s interest curve.

Game is Hard

So one thing that a cooperative experience like Salmon Run needs is longevity – something for players to latch onto so they keep coming back. One way Salmon Run achieves this is through an adaptive difficulty system. Based on how frequently a player is winning at Salmon Run, an invisible difficulty scale will begin to go up for them. Higher difficulty scales mean more frequent salmon spawns, and higher egg quotas. The higher scales demand more and more efficiency of the players.

So, cleverly, Salmon Run starts out very forgiving, allowing players of any skill level to begin to succeed and claim their rewards for the game mode. What I find commendable is how unrestrained the upper echelons of this scale is. A lot of the fun of horde mode comes from the horde- tons and tons of enemies coming at you all at once. Through grit and determination, you can overcome.

An octopus girl is surrounded by fireflies as she picks up a golden egg with a net. She swims through blue ink to escape a frenzied mosh pit of enraged salmon, who flail at her with frying pans. She swims frantically away.
More like Salmon RUUUUUUUUUUN

Salmon Run also includes a lot of wrinkles and surprises, such as the special event waves, where the rules of the game are tweaked slightly. For example, high tide might shrink the play area, making the next round very claustrophobic. What is all this for, then? Well, like the level design which emphasizes situation awareness, every aspect of Salmon Run from its maps, to its enemies and bosses reinforces specific fundamental skills in the Splatoon player’s toolkit. Players are randomly assigned weapons they are forced to use, reinforcing general adaptability and understanding of the game’s mechanics. The maps are laid out to reinforce situational awareness and navigation skills. Specific bosses reinforce specific weapon-handing skills. As the game’s difficulty ramps up, so does the speed of the game, and the skills needed for mastery are further and more rapidly drilled into the player.

Entity Cramming

“Entity Cramming” is a term originating from Minecraft, a game which allows a very large number of entities like players, enemies, and animals to coexist in a very small space. Salmon Runs can get very cramped, very fast. Especially at higher difficulties with very high spawn rates, or during high tide, at which the viable play space shrinks. There is a need to combat the problem of overpopulation in a small space, to keep the game running smoothly and feeling fair. A lot of salmonid bosses possess some way to impede player movements or player attacks, or both. Even beyond that, with too many enemies present, it would become unfeasible for four meager squids to fight back, which would create an overwhelming and unfair disadvantage for the minor mistake of acting just a little too slow or inefficiently. There’s also the random chance that bosses might occupy the same relative space.

To combat this, salmonid bosses represent an inherent risk-reward factor. With many of them bunched up, there is great risk to approach them, but many slamonid bosses represent an opportunity to clear wide swathes of salmon all at once. There are bomb salmonid, for example, which explode and deal damage to their allies when defeated. When enemies are bunched up, players with wide-reaching area-affecting weapons can take out multiple of them at once. All bosses explode into friendly ink, which is toxic to some salmonid. The new Slammin’ Lid boss, added in Splatoon 3, will utterly crush any salmonid beneath it, bosses included, if it is goaded to use its slam attack.

An octopus-girl in a slopsuit approaches a green UFO piloted by a fish. The UFO hangs over two giant fish with bombs strapped to their heads. The UFO flashes, them falls directly onto the giant fish like a rapid hydraulic press, crushing them utterly into an explosion of orange ink.
Good Cod that is satisfying

So with this built-in risk-reward for salmonid bosses, it’s never too daunting when they team up. With a clever and careful approach, bosses can be used as weapons to take out other bosses! So while difficulty scaling leads to huge hordes of enemies, it also creates this rubber-banding effect where huge hordes of enemies can actual mean an increase in overall efficiency, where you’re dispatching two or three bosses at once, along with their smaller minions, rather than just one. At high levels of play, golden egg collection can skyrocket to huge profits.

Teamwork Teamwork Teamwork!

The real key to excelling at Salmon Run is efficiency, and efficiency is teamwork. It is virtually impossible to accomplish some of this game mode’s higher-end challenges without utter mastery and knowledge of your role on the team. The randomly assigned weapons ensure each player accels and struggles with some specific task. Long ranged precision weapons can take out unshield bosses from a distance with ease. Heavier wide-area weapons can dispatch crowds of small salmonid *much* faster that snipers can. Some weapons can defeat salmon from safety whereas others have to get up close and personal.

Later on efficiency becomes to important, that if you are ever swimming around with a full tank of ink ammunition, you are kind of a liability. My advice to ace Salmon Run? Always be doing something, whether its clearing small enemies or ferrying eggs. Rescue teammates as quickly as possible – four sets of hands outperform two or three. Everyone has a role to fill, even if that role is just moving eggs around, because you’re weapon is ill-suited to the current event wave. In Splatoon 3, a new event wave called the Tornado was implemented to highlight this. Large quantities of eggs spawn far away from the basket, so the four players must form an assembly line of sorts to taxi them across enemy territory. Kind of reflects the rough work environments that the game uses as its horde mode backdrop, huh? In fact, there’s a lot of parallels to game development in general..

An octopus girl in a slopsuit swims back and forth across blue ink, each time grabbing a golden salmon egg in a net, and hurling it up a ledge to a friendly squid kid, to whom it is handed off.
Pictured: The Production Pipeline

The Main Event: The Bosses

The bosses in Salmon Run are fun, inventive, visually creative, goofy, funny, and irresistibly compelling. They all fill specialized niches in the gameplay, and each reinforce a skill for the player. They all have specific rules for how best to deal with them. There’s a lot, so I’m going to rapid-fire-style review them in a series of mini boss breakdowns and see how they fit into this scheme, with a little more detail given on the new bosses added to Splatoon 3‘s Salmon Run.

Steelheads are giant salmon with bombs in their heads. They arm the bombs for a moment, then throw them as a player approaches. They teach precision aiming, as their weak point bobs about while it’s vulnerable. They also reinforce reactiveness to bombs and ground hazards – a common danger in Splatoon.

Steel Eels demand the skill of tracking moving targets, their weak point constantly on the move, and occasionally blocked by their own shield-like bodies. Terrain navigation is crucial here too, as getting sandwiched by one against another enemy or wall means death.

Scrappers, or Jalopies, as I like to call them, teach the skill of flanking. They always turn to face attacking players, and they are shielded from the front. Using teamwork, one player can distract or stun from the front as they other takes them out. This is one of the ‘kiteable’ bosses, which can be lured by the player to be very close to the basket when they die, leaving eggs right there. Retrieving golden eggs past salmonid enemy lines

Stingers are of a class of salmonid bosses I call ‘globals’, as they can damage players from anywhere on the map. Stingers use a long-range beam unimpeded by terrain. Stingers teach players a hierarchy of needs for the game. It’s near-impossible to kill every enemy as they spawn. Just reaching your egg quota and surviving is paramount. You have to triage your attention to what’s most important. Stingers are important. You’re excelling when you put out fires before they happen, and addressing Stingers quickly is a good example.

Maws can also be kited to the basket for easy eggs. They teach how to swim away while placing a bomb, which generally kills them. A surprisingly practical skill, as bombs cost a lot of ink, but swimming replenishes it. Efficient!

Drizzlers are a global salmon which create damaging rain that also ruins friendly turf. They teach lining up shots, and maintaining relative positions between player and enemy, as they are most easily dispatched by deflecting their projectile back at them. Lining this up is strict, to aim well!

Flyfish. Ooooh Flyfish. Perhaps most infamous of all salmonid. They are hovering mobile missile vehicles which periodically fire squid-seeking missiles at players who must be moving to avoid them. This is global. They are easily one of the most dangerous bosses to keep alive, so a great marker of Salmon Run mastery has become one’s ability to safely and efficiently take them out. Taking them out quick is a true marker of friendship between allies. They teach precision use of the grenade sub-weapon, as you must land a grenade in its open missile launchers after it fires. Twice. Once for each launcher. It also teaches patience, and the truth of your own mortality.

An octopus girl in a slopsuit swims through green ink to throw a grenade into the open missile launcher of a hovercraft being piloted by a salmon, just as its second missile launcher as been destroyed in a similar way by a friendly squid kid nearby.
Any man who can one-cycle a flyfish with me, I would trust with the life of my child.

The Slammin’ Lids (god I love that name) are one of two new Salmonid that seem to be purposed to teach one of the two new movement options in Splatoon 3. The lids are easiest to kill by baiting out their slam attack, then mounting them while they’re on the ground, to kill the pilot. The easiest way to do that, is by using the new Squid Roll, which allows rapid turning while swimming through ink. They are also one of the best example of the entity cramming solutions in Salmon Run, as I’d shown earlier. Their main threat is the impenetrable shield they produce beneath themselves, which can obscure lines of fire while they pump out small salmonid to shore up the enemy forces. They aren’t high-priority targets, but can become dangerous if they take up advantageous positions.

The Fish Stick is a toward carries by a rotating contingent of salmon. The stick is easily dispatched using the new Squid Surge, which allows one to rapidly ascend a vertical surface. The Fish Stick fills a new niche in the game mode, which is the use of the player’s wall-scaling abilities, and introduces an enemy that is itself terrain that can be inked. What’s really interesting is that the Fish Stick’s terrain remains in play even after it’s defeated and its eggs are retrieved, opening new strategic options for players. This can be a double edges stick though, as while the extreme vantage is usually safe, some salmon like the maws or dreaded fly fish can use its small surface area to trap players.

The Flip Flapper is a salmon dressed like a dolphin which drops rings of enemy ink where it is about to dive. Filling in this ink with friendly colors before it lands, stuns it and renders it vulnerable. I love this thing because it teaches the teamwork of efficient ink coverage. Nothing worse than teammates who waste time inking something you’ve already inked. Working together, these dolphin wannabes are no challenge, but they also serve Entity Cramming well, as they are very weak to the splatter from other enemies nearby being killed.

Big Shots are tough guys with lots of health that stay on the sidelines. I think what these guys are meant to teach is how the AI operates and reacts to player movement. You see, the Big Shot is a global who uses a machine at the beach to launch wave-generating projectiles toward the basket. Very inconvenient. What is, convenient, though is that the player can use the same device to launch golden eggs toward the basket. Toward, not in, mind you. Another player still has to be there to cash the eggs. If they don’t, salmonid will come in and snatch them up, making the players’ efforts a waste of time. What’s more, is that spending too much time on the beach, which I might remind you is where salmonid come from, can mean quickly becoming overrun by enemies, and trapping you in a place which is very dangerous and inconvenient to reach. Teaches teamwork and restraint.

And octopus girl holding a bathtub uses it to throw green bubbles at a giant salmon on the beach below who is fiddling with a wood-chipper like machine, and is then exploded into green ink. An allied squidkid below loads a golden egg into the machine, which is then launched across the field of view.
Couldn’t have gotten better footage of that egg being thrown by the Big Shot if I’d planned it

There are a few more event-specific bosses, but that was a lot, I think, so we’ll leave it at that.

EMERGENCY!

Octo-girls and squidkids are celebrating, only.. "EMERGENCY!" appears in orange text. Suddenly, a GIANT, like 30-60 foot tall salmon appears, and roars like godzilla. "King Salmond Cohozuna" appears in white text.

JUST KIDDING! They couldn’t have a sequel without upping the ante a little, right. At (slight) random, after winning a few Salmon Runs, the new King Salmonid Cohozuna will appear. You have a mere 100 seconds to send him back to the briny deep in order to secure the special fish scale rewards he provides. Really, there isn’t much to him or his AI beyond standing as a suitable final challenge to really test the player’s mastery over all these bosses and systems. His implementation is pretty clever, though.

He has a LOT of health, so normal weapons will simply not do enough damage to vanquish him on their own, not in the time allotted. To beat him, you’ll have to leverage golden eggs, which can, in this bonus boss round, be thrown with zero ammunition cost. They deal massive damage to him, and the only way to get them remains the same: defeat the boss salmonid that accompany him. You’ve only got 100 seconds, your team, one special weapon, and the ink your back, so I hope you’ve been practicing your aim and reaction time.

He seems to prefer to follow the last player who damaged him, so he can be tanked somewhat. He’s not that dangerous on his own. He’s slow, and only has two real attacks. One where he belly flops right in front of him – so keep somewhat at a distance. His other is a jump, which does heavy damage where he lands. Be ready to move. Other than that, it’s his health and his bulk that is the challenge. The team needs to work together to get enough eggs to bring him down, while positioning him such that he is not a threat to the team, and such that he is not covering vital resources with his body. It’s a stiff challenge, but if you really push your self and put a full understanding of all the little things Salmon Run has been teaching you, it’s very doable. A suitable finale to any work day.

A giant 30-foot-tall salmon flops toward an octopus girl wielding a an automatic ink-gun. He is being pelted from the sides by golden projectiles. He turns around, then bursts into green ink in a fantastic explosion. A squidkid declares "Booyah!" as the four cephalopod teammates, now friends, celebrate.
That’s teamwork!

The Cohonclusion

Where. That felt like a gauntlet. We all get through okay? Yeah so I love Salmon Run, to reiterate. It’s got so many little clever design considerations to acutely tune the experience and promote active thinking while playing. Sure, it’s great fun to goof around in with friends, but even at a casual level, enough exposure to the game mode will gradually train certain behaviors that make you better at it. I think that’s a sign of some absolutely excellent game design, that deep consideration of incentives and how minor tweaks to Splatoon‘s gameplay setup will reinforce certain behaviors. Salmon Run is also just where some of Splatoon‘s considerable creativity comes to the fore. I mean “Slammin’ Lid”? An eel made of shower heads that forms an impenetrable wall of showering ink? A mothership that is a warehouse container full of smaller crates that deploy salmon? Come on. This stuff is gold.

An octopus girl swims across orange and green into into a torrent of orange produced by  allied weapons. She is showered with golden eggs as salmon burst around her. She grabs one and throws it into a large basket.

DO YOUR JOB!

Sonic vs. Shadow Boss Breakdown: A Case Study

It’s April 2022, I just came back from the movies, and it’s got me in a Sonic mood. Sonic Adventure 2 was Sonic’s second major 3D outing and personal favorite of mine, warts and all. The big gimmick of this game was ‘hero versus dark’, or in other words two concurrent stories centering on our familiar heroic blue hedgehog Sonic, and the new dastardly red and black hedgehog Shadow, who has all the same powers that Sonic has!

The Sonic and Shadow showdown that’s built up across the game’s story was always a highlight for me as a child. It’s aesthetically and narratively well-realized, a great moment of tension and catharsis for one invested in the wacky world of Sonic. So it works on a number of levels. Taking an older and more analytical eye to it though, it is far from an ideal example of boss design in motion. Like much of Sonic Adventure 2, it has its share of flaws. So for this boss breakdown, I’m going to approach things a little differently, and go through an alternating list of the boss design’s pros and cons, trying to glean where this boss succeeds and where it falls short.

Sonic the Hedgehog stands in a long starship-like hallway. He is surprised when Shadow the Hedgehog walks up from behind him and begins to speak "You never cease to surprise me blue hedgehog. I thought that the capsule you were in exploded in space." 

Sonic replies, "You know, what can I say... I die hard!"
The motion-captured cut scene animations are still pretty comically bad, though.

First, a quick overview. The player takes the role of Sonic or Shadow, depending on which story path they chose. Their opponent is whatever hedgehog they’re opposed to. In either case, the fight is identical, as both characters share identical movesets as players and as AI bosses. The two hedgehogs run along an infinitely long looping pathway suspended in outer space. Pieces of it fall out from under them if they run too slowly. If the enemy boss hedgehog falls off the path, they teleport back to the stage ahead of the player’s position. If the player does the same, they fall to their death. The enemy will occasionally use a homing attack on the player, which can be deflected by jumping, which produces a protective spin-shield on the hedgehog. The enemy can do the same, however, meaning most homing attacks will be deflected unless the player can make an opening in the enemy’s defenses.

These openings, as far as I can tell, take three forms. First, if the player lags behind the enemy by too great a distance, the enemy will come to a halt, and launch a screen-wide super attack, which can be avoided with a well timed jump. During this moment, the enemy is vulnerable to attack. Second, if the player runs too far ahead, or the enemy falls off of the arena, they teleport back onto the road ahead of the player, after which they are vulnerable for a brief moment, although this window of vulnerable seems to narrow as the boss’s health gets lower. Finally, timing an attack such that it hits the boss in the short window of time they are on the ground after landing from a jump, they are vulnerable.

With that out of the way, let’s get to some of the particulars.

Pro: We Framed The Camera

So Sonic Adventure 2 (and a lot of 3D Sonic games of this era for that matter) has a bit of a reputation with its camera. So this one might come off as somewhat of a backhanded compliment, haha. To be fair, I think the direness of the state of SA2‘s camera is often vastly overstated, when compared to other 3D cameras of the time, or even other Sonic games. Point is, sharp turns and elaborate level geometry could be let’s say… challenging for the hard working early 2000’s 3D camera, so Sonic Team played to their tech’s limitations and its strengths and placed this boss fight on a seamless, infinitely long straightaway.

With no turns, nor obstructions, the player always has a clear view of the action and the goal- defeating that enemy hedgehog. This has the added bonus of creating a series of dynamic set pieces visually between Sonic and Shadow’s fight, with the camera being centered on the highway path.

Sonic the Hedgehog outruns Shadow. A moment later, Shadow teleports in front of Sonic in a flash of green light.
Nothing but you, me, and the cinematic cameraman following behind us

Con: Rings, Rings Everywhere

Someone once did a write up on Sonic The Hedgehog’s traditional health system that utilizes its collectible coins. This system has a lot of flaws, in my eyes. The simple version is, that because having even one ring on Sonic has nearly as much advantage as having a billion rings, while having zero rings leaves Sonic in a drastically more vulnerable state, it is very difficult to build a consistent level of challenge with this health system. The battle between Sonic and Shadow takes place on an infinitely long looping pathway. It would be very possible, even likely, that most players upon taking a hit from Shadow or Sonic simply kept running, missed picking up their rings, and were left with a crushingly difficult unreasonable encounter.

This is obviously not desirable in a game marketed to children, and so to counter this eventuality, it was decided that the infinite path contain infinite rings. This is also a problem. So long as you keep collecting these readily available, plentiful rings, it is essentially impossible to lose this boss fight that is an alleged death battle between super powered titans. It doesn’t matter how many times Shadow strikes Sonic with a chaos spear, or how often Sonic homing attacks Shadow. If the player can collect more rings, and they can, they’re in no danger. It kind of takes the wind out of the tension-sails when you realize this.

Pro: The Game Does Not Tell You What To Do

There’s a certain appeal to to the idea of just being placed in an arena with a hostile opponent and… going at it. No rules, no holds barred, no ifs ands or buts. Of course, there are rules, such boss designs simply give the impression that the player can control the pacing of the fight, and can achieve progress against the opponent with mechanisms entirely driven by their own ability, not by arbitrary timers or enemy behavior tables. Someone once did a write up on the subject using The Legend of Zelda as an example.

When fighting Sonic or Shadow it is not initially entirely clear how one is meant to deal damage to them. They have a health bar indicating damaging them is the goal, but not much else. There’s very little indication of the boss’s weakness. The player’s standard methods of attack up to this point, homing attacks or the spin dash, have no effect in most situations. For a final confrontation, this makes sense. Shadow and/or Sonic stand as an imposing ultimate challenge with no clear exploitable point. It’s up to the player to decide how best to approach the enemy supersonic hedgehog, as their opponent has all manner of ways to deflect incoming attacks, such as rolling into a ball, homing-attack the player in retaliation, or using one of their screen-wide super attacks. This bare-knuckle brawl kind of boss design works well in establishing the tone of two co-equal rivals finally duking it out and giving it their all. If Shadow or Sonic had a big glowing ‘attack this to kill me’ button somewhere it would certainly diminish the effect.

It’s also worth mentioning, this is the second such encounter between Sonic and Shadow. The first, in an enclosed square arena, is a lot less exciting to play and talk about. I bring it up because it does begin to engender some of the concepts of how to fight the enemy hedgehog that you see here, but that fight also suffers from not being entirely clear on its mechanics, so the player will likely not have learned a definitive approach to fighting Sonic or Shadow by this point.

Sonic the Hedgehog repeatedly homes in on Shadow the hedgehog, but Shadow rolls up in midair to protect himself, deflecting the attacks.
Standard methods of attack don’t work. Figure out a way past his defenses!

Con: The Game Does Not Tell You What The Heck To Do

Yeah okay, so there are advantages to unstructured boss fights, but Shadow and Sonic’s weakness does exist, and it is largely arbitrary. The game gives little to no indication at all how best to damage the boss, and as a result, even for players who’ve defeated this boss before, it may not be entirely clear how they did it, and reproducing those results may require a lot of fiddling around with the boss’s behaviors. There is a method to consistently damaging Shadow or Sonic in this encounter, but to get there you really have to do some meandering experimentation. The investigative nature of this isn’t without its fun but it does feel kind of weird and incongruous, like a puzzle whose pieces fit together, but do not form a picture of anything.

Why is it, for example, that Shadow will only use his super move ‘chaos spear’ when Sonic has let him run far ahead down the path? Why does he stop dead in his tracks when chaos spear is used, leaving him vulnerable? This might have made a lot more sense if Shadow had a special animation to indicate he had to slow down to concentrate when using chaos spear, which would also explain his vulnerability and why he’d wait until he got some distance from Sonic before using it, but the player is left to essentially fill in these blanks themselves. Given the loose, fiddly nature of the boss’s behaviors, it’s also very possible to simply mash buttons and attacks against them until the encounter is won. Combined with the ring systems, there’s really no way to enforce a failure state to dissuade this, which in my eyes is an issue. The player should feel like they accomplished something even it’s an easy, so the possibility of a largely accidental victory is undesirable.

Sonic the Hedgehog and Shadow the Hedgehog repeatedly roll up into balls and bounce against each other, until Sonic lands on shadow's head and he dies
I can barely tell what happened here, and this is my gameplay footage

Pro: Forward Momentum

Sonic’s the name and, you may have heard, speed’s his game. If that’s the case it’s kind of wild that a ton of Sonic boss battles have nothing to do with the aforementioned. The premise of Shadow the hedgehog as a character is that he’s a dark mirror to Sonic the hedgehog, capable of all the same feats of speed and agility. Since that’s the big selling point here, we want our boss fight to illustrate that, thus the long straightaway.

Infinitely looping paths along which to run whilst fighting a boss would eventually become a halmark of the Sonic the Hedgehog franchise. It was actually kind of a rarity at the time of Sonic Adventure 2, though. The advantages are obvious. With an unobstructed pathway Sonic is free to run at full blast, the most fun thing to do in a Sonic game, while Shadow matches the speed, and the spectacle of a high-speed superpowered battled is nearly realized right there. Bits of the looping pathway collapse, leisurely, as they are cycled off-screen, gently encouraging the player to not stop running, keeping the pace of the fight breezy. It all works very well to construct the scenario they were going for.

Sonic Adventure 2 also iterated on the lightspeed dash, in which Sonic can quickly move across a path of rings with a well-timed button press, which gives an excellent and rewarding avenue for expressing player skill. Stringing together dashes along the many paths of rings is a blast.

Sonic zips across a series of paths made of gold rings at incredible speeds.
God I love this game

Con: The Enemy Is Not Proactive

I did praise this boss for being rather player-driven, allowing the player to decide the pace of the fight. However, the fact that the boss will do very little to actually attack you is a major problem for me. Shadow and Sonic are in a dire situation involving the fate of the earth and an orbital laser beam capable of blowing up half the moon. Things need to be tense, and the danger needs to run high. The hedgehog being controlled by the AI, though, just doesn’t feel especially desperate to kill the player. They will happily run alongside you, but never really do much to harm you unless you position yourself in a specifically vulnerable spot. The enemy homing attack is especially easy to deflect. If you run too far behind they’ll do that super attack I mentioned earlier. I feel as though a lot more could’ve been done to establish that the boss is very motivated to defeat you, and I would’ve included some more regular attacks and obstacles that the player has to maneuver to keep up. A lot of what makes running fast in Sonic, after all, is the satisfaction of skillful execution in avoiding hazards.

Pro: Timing and Execution

As unclear as the ‘rules’ of the boss’s behavior are, they do exist, and executing on them can be a lot of fun once you understand them. One of my favorite strategies for damaging the boss is to hang back, causing them to use their screen-wide super, then rush ahead and use the ring-dash to dash straight through the vulnerable enemy. These interactions are actually very compelling, requiring a reasonable bit of skill and control to execute on. It’s actually so fun to land hits on the enemy hedgehog once you understand what is actually going on in their behavior table, that it makes it even more frustrating that a lot of this is not clearly communicated.

Shadow the hedgehog stops running for a moment to shoot orange energy projectiles at Sonic, but Sonic dodges them and homes in on Shadow to damage him.
Baiting the enemy into an attack and retaliating does feel pretty good.

Pro Again: Aesthetics

Alright this article has been pretty critical of my blood brother Sonic Adventure 2, so I’ll end with one last pro that’s less to do with the gameplay design, but still an essential feature. If you didn’t know, aesthetics deal with all the principles of beauty, not just visuals. It’s an overall feel. A style, if you will. And man, does this game have style coming out of its comically large cartoon hedgehog ears. Shadow and Sonic are under-lit with an eerie green light that accentuates the alien environment and makes Shadow look positively menacing. The techno-electronic music blares with strange bell samples with some of the edgiest lyrics you’ve ever heard in your life. You can see the earth frames against the black sky. Meteorites and pieces of the space colony zip by as you run across this collapsing sci-fi highway. The fight has a lot to be desired in terms of gameplay depth, once you really deconstruct it, but it is an absolute juggernaut of presentation, for the year it debuted. Sonic has always done spectacle well, and the promise made by this game’s marketing: an epic showdown between an unstoppable force and an immovable object in the form of two equal superpowers of opposing worldviews, is fully realized through the aesthetics. Aesthetics can elevate an experience, and Sonic Adventure 2 leans into this hard.

Sonic the Hedgehog runs alongside the menacing Shadow the Hedgehog as "Shadow" is spelled across his image. The two speed down a scifi highway amidst meteorites and space colony towers against the black of space.
This is one of the coolest things ever produced and I will entertain no dissent on the subject

It’s been a lot of fun reliving this fight, one of the longest-held in my memories, with the benefit of many years of design knowledge. The ‘rival’ fights in Sonic Adventure 2, in which the boss is a player character from the opposite story path, were heavily limited in what they could do, as they exclusively utilize the player character assets, animations, movement systems, etc. That said, it’s clear that this climactic battle was trying really hard to do a lot with a little. Not everything about it is stellar, but I think it’s still commendable they managed to make a pretty fun boss encounter that at least heavily delivers on the narrative promises of the game, if nothing else. I still find so much value in looking back at design of games like Sonic Adventure 2 that shaped my childhood, even with all of their flaws.

Sonic The Hedgehog celebrates over the unconscious defeated body of Shadow the hedgehog, standing on a sci-fi skybridge in the black of space, surrounded by inverted skyscraper-like structures.

That blue hedgehog again, of all places…

The Evolving Boss Design of Elden Ring: Godrick The Grafted

Yes, yet another FromSoft post. In my defense, Elden Ring, 2022’s action RPG release, and FromSoftware’s foremost foray into the open world game format is impossibly large, and has proven just as impossible to keep out of my head. Boss battles, with their big climactic set pieces and heightened sense of challenge have always been FromSoft’s bread and butter when it comes to their contemporary era of action games. It seems these games are constantly pushing the envelope of how grotesquely deadly these big baddies can be. The opening boss battles of Elden Ring are a strong showing, coming in with all the bombast, shock, and awe that I’ve come to expect, but I did notice something – a subtle shift in the design for the likes of Margit The Fell Omen and the first major ‘chapter boss’, so to speak, Godrick The Grafted. This new design direction seems to carry forward with the rest of the bosses of the game, so I really wanted to talk about it.

In a castle courtyard, a huge man made of many limbs grotesquely frankenstein'd together swings his axe above his head, summoning gusts of wind upon which he rings up into the air, then slams his axe down on a thief, who dodges out of the way.

For those unfamiliar, combat in FromSoft RPGs generally can be broken down like this; The boss has a pool of attacks and moves from which they will select their action, reactive to the player character’s position relative to themselves. A dragon may swing its tail if the player is behind them, or breath fire if the player is standing at a distance, and such. In response, the player has a number of options including blocking with their shield, moving out of the way of the attack, or avoiding damage with the dodge roll maneuver, which gives the player a brief window of invincibility. The dodge roll is very very powerful, and potentially frees up a hand that would otherwise be occupied with a shield, so the player can two-hand a more powerful weapon, or offhand a second weapon. As such, the dodge roll is traditionally the player’s greatest tool of avoiding harm while they look for punishes, brief windows in which a boss cannot counterattack. These punishes happen when the end of a boss’s action animation precludes them from taking another action for a brief moment. The recoil of swinging a huge axe, for example.

Traditionally, FromSoft RPGs like Dark Souls and the like have a very powerful strategy when it comes to fighting bosses – getting behind them. Though even as far back as Demon’s Souls, many enemies were equipped with back-facing attacks meant to dissuade players from becoming too comfortable back there, the caveat was generally that these back-facing attacks were a lot more manageable than many of the front-facing ones, so circle strafing enemies remained a pretty dominant strategy in most situations, all the way up to Dark Souls 3, with some exceptions, but we’ll get to that.

When I first fought the major boss Godrick The Grafted I found myself failing and dying. A lot. To be expected of the infamously difficult FromSoft RPGs, right? Well sure, but Godrick is a very early game boss, so I had to rethink my approach. Surely the first major boss couldn’t be that difficult. Godrick’s fight is split into two phases, though both operate generally the same. He has a large pool of attack options, but I’ll mention some of the most common ones. First he has what I’ll call his basic attack combo, which he prefers to use on players that are standing medium-close to him, in front of him. It starts with a very slow axe swing to teach players to rely on their eyes for dodge cues, not just prediction, as aggressive predictions tend to result in early dodge rolls that are punished by such slow attacks. He’ll then follow up this axe swing with a series of swipes of his arms and axe, using a combo of variable length. If the player disengages, the combo stops at two attacks, but continues for up to four attacks if the player stays close.

In a castle courtyard, a huge man made of many limbs grotesquely frankenstein'd together brings his axe down on a thief, who ducks and dodges toward the arc of the axe swing, avoiding harm, but getting hit by the grotesque man's swinging arm, just as the thief is standing up.
The hitbox of this move is designed very specifically to catch players getting too close.

This attack presented a bit of a problem for my muscle memory. The dominant strategy of old in Dark Souls was to ‘dodge through’ enemy attacks. If you got the timing right, the invincibility of the dodge roll could carry you through the hitbox of an enemy sword swing, and the best way to do this would be to dodge into the arc of the swing, toward the direction it’s coming from. This minimizes the time your player character and the enemy hitbox intersect, making a successful dodge more likely. This results in a lot of getting behind enemies and proverbially hugging them up close. Try this on many of Godrick’s moves, however, and he’ll have a hasty response.

The better maneuver is to out-range Godrick, and dodge away from him as he attacks, dodging or moving toward him only to punish his openings, although these can be difficult to judge at first because he has so many followups. Remember how I said his basic attack has a variable length? Many many of Elden Ring‘s baddies have followups like that, contingencies to account for the different places the player might be standing to avoid harm, so sometimes what you think is a punishable opening on a boss is simply not.

In a castle courtyard, a huge man made of many limbs grotesquely frankenstein'd together wildly swings his axe at a thief, as the thief sprints away, out of his reach.
Dodging this attack with rolls is theoretically possible, but so high-risk as to be ill-advised

Godrick’s ‘big swing’ attack, as I like to call it, happens when he rears up his axe with both hands slowly, giving the player ample time to reposition themselves in response. This attack has five very large swings, some of which hit in nearly 360 degrees. They’re also very deadly, making standing up close to him equally as deadly. This attack is very punishable, but only at the end of its run. Godrick has a lot of attacks like this, such has his whirlwind, which not only nudges players away in a circle around him with a bit of damage, but is immediately followed by one of two attacks that very difficult to distinguish without the full picture, and dodging the wrong one could mean taking a big hit. A lot of Godrick’s and many Elden Ring enemies’ moves are like this. They are of variable length, and potentially can sweep the player up in a very long combo. It’s not that getting behind a boss is impossible, it’s just not very safe.

Another feature worth mentioning, is the stagger system, somewhat borrowed from Sekiro. All enemies have an invisible value that is diminished when they take a hit, but constantly regenerates over time. If this value hits a certain minimum, the enemy will stagger, and become open to a critical attack. Due to its nature, and the many variables that go into it, this value can be somewhat unpredictable, especially as it is not displayed anywhere, unlike in Sekiro. Previous FromSoft RPGs had systems like this, though they were less powerful, only allowing an extra hit or two when enemies stagger, rather than a chance for big damage. Since the exact moment a boss will stagger is so unpredictable, the best thing to do is to just keep up the pressure, to increase your likelihood of getting a stagger, which naturally makes Elden Ring combat more aggressive and high-tension.

In a castle courtyard, a huge man made of many limbs grotesquely frankenstein'd together leaps into the air riding on a whirlwind and slams his axe down, but his target, a thief, dodges out of the way, then stabs his exposed body several times, causing the hulking man to gush blood, and fall onto his knees.
Whenever a stagger does occur, it creates a rewarding moment of catharsis

Frequently, if you do manage to get behind Godrick he’ll roll out of the way, and quickly prepare another attack. This often results in taking a hit, and disrupts your ability to consistently damage Godrick, meaning you’re less likely to stagger him with this route.

In a castle courtyard, a huge man made of many limbs grotesquely frankenstein'd together rolls away from a thief as the thief positions himself behind the hulking man. As he finishes rolling, the man swings his arms at the thief.
Godrick is quick to respond to unfavorable positioning.

So what’s going on here? Why do the bosses in Elden Ring feel so different? I think I know. It seems to me that a major design goal for the bosses of Elden Ring ties into that verisimilitude I talked about when discussing Sekiro. FromSoft wanted fights in this game to feel more genuine, to reduce the friction between the gameplay and narrative of a life-and-death fight. In a real fight, you’d expect there to be a lot less dancing around opponents and a lot more squaring up, staring them down face-to-face, standing opposite one another as you trade blows. As such, everything about Godrick’s boss design makes him equipped to enforce that scenario. Getting behind him is dangerous, standing too close is dangerous, all defined by Godrick’s particularly designed behavior.

In a castle courtyard, a huge man made of many limbs grotesquely frankenstein'd together takes his own battle axe and slams it into his other arm, screaming all the while, before succeeding in cutting it off, the end of his arm landing bloodily in the foreground.
Extremely normal behavior.

Between a much broader repertoire of tools at his disposal for hitting players at any angle, the ability to quickly reposition himself, and a much more unpredictable, variable moveset that adapts in length and reach to player positions in real-time, fighting Godrick the old way is much less viable. When players have to rethink their approach, they’ll likely come to a similar conclusion I did; the safest place to fight Godrick is in front of him, at a decent distance, where they can see his attacks clearly, and where dodging is less likely to be a death sentence. Compare Godrick to an early boss from the first Dark Souls game.

A rotund demon in a crumbling ruin swings a mighty hammer at a thief, he dodges the swing and rolls behind the demon with ease. The demons stands there for a moment, then swings his hammer feebly in front of him, unable to reach the thief.
Godrick would have killed me three times by now.

Notice how completely unable the asylum demon is to respond to my parking behind his rump. The Asylum demon does have an attack that can reach behind him, but it is exceptionally easy to dodge, with a huge slow windup. Also, it’s only just the one. Outside of trying to butt-stomp the player, the asylum demon really has no options. He can’t reposition himself either. Godrick, on the other hand, can… slam the ground to create a large earthquake in a circle around him, quickly whip up a whirlwing that knocks nearby players way, jump into the air to reposition himself and attack simultaneously, roll away to a more advantageous position, initiate his 5-hit super combo, etc.

Sped-up footage of a thief continuously circling around a large demon, standing behind him as the demon fumbles to try and attack the thief, in an old dimly lit ruin.
Yep, it pretty much just goes like this.

The old way of fighting bosses in Dark Souls was, and still is, fun. Some of the most fun I’ve had in a video game, but FromSoft isn’t a developer to rest on their laurels. The evolution of their boss design seems to be working more and more to create a believable experience with a strong sense of weight and presence. Verisimilitude is a major priority, but not only that, there are a lot of important advantages to designing bosses this way. For one, the player will be able to admire and appreciate the art of the boss they are fighting a lot more from a nice, framed, middle-distance shot, than from standing between their legs (depending on the boss, and the player, I guess..). The clearer framing also makes reading enemy telegraphs a lot clearer and easier. If a player is rightfully standing behind a boss because it’s the safest approach, camera zoomed up way close, they might understandably become frustrated by attacks they cannot see, and won’t determine the reason, succeeding by their strategy in the end, but having less fun in the process. Since so many of a boss’s attacks are triggered by the player position, having the player spend so much time in an awkward position may result in them not even seeing the boss’s coolest most impressive attacks, diminishing the entire set piece.

It seems FromSoft has been working toward this goal of the ‘squared off, face-to-face’ boss battle as a default for a long time. As far back as Dark Souls 2, we saw evidence of this. It is very popular to complain about the enemies’ ability in that game to track the player’s position with their attacks, meaning the enemy’s entire model actively rotates to align itself with player position, making circle strafing a weaker strategy. This worked to an extent, but also was pretty transparently artificial. People really just don’t move that way, spinning on their heel to align the swinging of their arms in a way that defied physics, so much so that my friends and I had taken to calling the process the ‘ballerina twirl’. Bloodborne reduced the ballerina twirling quite a bit, making up for it by giving the player a tool which made squaring up with bosses a lot safer – an extremely powerful frontal parry. Since the player needed their enemies to attack them from the front to succeed in a parry, it became a much more desirable spot to stand. The backstab of Bloodborne, being so slow, also meant circling around was suitable for stealth, but less suitable for active combat. Dark Souls 3 introduced a lot of the standard for how attacks are shaped in these games; big sweeping things that sometimes make as much as 360 degrees around the boss a danger zone. That game also introduced a lot of the adaptability and variability of enemy move-sets that made them more equipped to react to players constantly trying to get behind them.

This new design direction seems to have culminated in Sekiro, which was developed alongside Elden Ring. In Sekiro, parrying is everything, so enemies had to constantly be positioning themselves and the player into a squared off position. A lot of strategies employed to accomplish this seem to have carried over to Elden Ring, adapted to account for the lack of a strong parry, of course. The behavior of Sekiro‘s largest bosses is rather reminiscent of Elden Ring bosses. I can’t say I dislike this new direction FromSoft is taking its boss design. Godrick is a fun and exciting challenge, and one I actually got to see visually in its full glory! Just while recording footage for this post, I was struck by how consistently beautiful and exciting the action looked in motion, so by my estimation the efforts to make fights in Elden Ring feel more genuine, worked.

A hunched, cloaked figure gently caresses the face of a skewered dragon carcass in a castle courtyard. A close up of the figure reveals a six fingered hand.

…And one day, we’ll return together …to our home, bathed in rays of gold…

Boss Breakdown: Bloodborne’s Blood-Starved Beast

You step into a large chapel overgrown with sickly vines and eerily empty, save for one hunch-over figure at the back, nearest the chapel shrine. It stalks toward you like an animal as its boss music kicks in, and you’re introduced to its name: Blood-Starved Beast. The Blood-Starved beast is a mid-game boss in FromSoft’s action RPG Bloodborne. Though technically optional to complete the game, Blood-Starved is centrally located, and gatekeeps one of the game’s major features; the chalice dungeons. It is thus likely to be a boss that most players encounter toward the start of Bloodborne‘s mid-game. This malnourished and emaciated figure fights with the ferocity of a starved predator, and its design backs up this idea while also serving appropriate functions within the overall experience of Bloodborne.

A hunter in a long black coat and tricorn hat pushes through a wall of fog into a run down stone chapel, lined with columns and torches. A lone figure, on all fours, slowly trudges toward the hunter from the distant shrine of the chapel.
FromSoft really knows how to set the scene

My philosophy when it comes to design, and especially in regards to big set-piece combat encounters like this is to reinforce the overall feel and experience of the game. It’s one of the reasons I so admire FromSoft’s design ethos overal.. Bloodborne, at this point in its story, is a visceral gothic horror about hunting horrible, bloody beasts. It’s gritty, it’s guttural, and it’s dangerous. The blood-starved beast begins to reinforce Bloodborne‘s overall aesthetics and feel from the moment you see its visual design. It’s a hunched-over, somewhat skeletal, feral humanoid figure with large portions of its skin bloodily peeled from its back, and draped over its head like a shawl. It’s a gruesome sight that reflects the environments and tone of Bloodborne. It fights with a hunter’s aggression, homing in on the player with a ravenous intent, keeping the fight high-intensity. The Blood-Starved beast is a quintessential representation of Bloodborne‘s hunt. It’s bloody, it’s animalistic, brutal, and imminently deadly.

A hunter in a long black coat and tricorn hat runs at a semi-humanoid skeletal beast, who charges at him on all fours, before wildly swiping at the air with large claws.
This thing’s animations and attacking pacing create a frantic sense of danger

Blood-Starved’s sense of danger is essential to making its fight come together. It needs to feel as though this thing could rip out your throat at any moment, a violent, unstable, rabid animal. This is most embodied in its grab attack, which does a huge amount of damage and can potentially kill a player outright. Highly lethal attacks like this are a favorite of FromSoft’s design to establish the threat of their enemies, and keep them oppressive. The ever-present looming promise of an attack that can potentially outright end the fight in a game over keeps the player on their guard, and shores up the tension. That said, such attacks can feel cheap and unfair if not handled carefully. If an attack is extremely deadly, best practice is keep it predictable and telegraphed, so if the player does fail to avoid it, they don’t feel as though they were blindsided, and the mechanic remains one of skill in the player’s mind, not a random vector of bad luck. The Blood-Starved Beast assumes a very particular posture, it’s normally gyrating and animated movements become still, and focused, it’s arms almost exactly shoulder-width apart in an even stance. This stance really stands out once you know to look for it, rewarding close observation of the boss, which is a standard for FromSoft enemy encounter design, something they are very much always looking to reinforce.

A hunter in a long black coat and tricorn hat strikes a vaguely humanoid skeletal beast with an overhead swing of a large battleaxe. The beast reels, but then assumes a steady, wide stance, before leaping at the hunter, who barely dodges out of the way.
After the first axe strike, you can see the beast assume this very still, square stance, a clear telegraph for its deadly grab attack, seen here missing the player.

On the more usual and rote side of things, the Blood-Starved Beasts’s primary attacks almost exclusively are aimed in front of it, and they have very little player tracking, meaning just a bit of movement will move the player out of danger. If the player moves too far away, however, the beats will initiate a Dashing attack that covers a lot of ground, to reset the neutral positions of the fight. These patterns, while predictable and simplistic, create the very strong spacial dynamics of the fight.

Blood-Starved’s quick attacks and short response time make it dangerous to approach, and risky to engage in close combat. As an early-to-mid-game boss, Blood-Starved functions to help really cement the player’s skillset and prepare them for the steeper challenges that are to come, and it does so by emphasizing Bloodborne‘s parry mechanic, in which players shoot an oncoming attacker with a firearm just before being hit, stunning the enemy and preparing them for a visceral counter-attack. It’s a powerful option that can carve through enemy health bars quickly, and will remain useful throughout the rest of the game, so Blood-Starved really pushes the player to master this. Its attacks are fast but reactable, wide-reaching but mostly short-ranged, perfect for being parried by the player’s firearm. If the player utilizes the parry and visceral attack, the difficulty of the Blood-Starved Beast can be curbed to a great degree, rewarding mastery of the skill.

A hunter in a long black coat and tricorn hat is attacked by a vaguely humanoid skeletal beast who swings with its immense claws horizontally, striking the hunter just as he blasts the beast with a flintlock pistol. The beast reals from the gunshot, so the hunter grabs it by the neck, and violently rips out a gush of fluid, sending the beast flying onto its back.
Even though the player takes damage here, he is able to rally all of his health back thanks to a well-timed, aggressive parry, while grievously harming the boss to boot.

Later on in the fight, The Blood-Starved Beast will start to string a long series of attacks together. With a maneuver like this, the beast is more likely to get some licks in, to give players more opportunity to leverage the health-restoring rally system, which rewards reprising attackers. It also punishes a lack of attention paid. Once the attack begins to hit a player, it is not difficult to disjoint with a dodge so the remaining hits miss, but being caught unaware could mean quickly and drastically losing health. There is one more feature to this attack though, which is that, since it’s a rapid series of strikes it makes parrying it very easy. A lot of times FromSoft will employ rapid attacks like this that seem very intimidating, but realizing how parrying works – that it requires player input to intersect with a certain part of an enemy’s attack animation, means knowing that if you try to parry one of these rapid attacks you are very likely to succeed, as the enemy’s ‘vulnerable’ animation is flashing past over and over again, and it only needs to be snagged by your parry attempt once. As I supposed this boss is meant to greatly reinforce the use of Bloodborne‘s parry, I suspect this is one of the primary reasons for the presence of this attack, a reliable parry opportunity. It’s a powerful attack, but it can be turned against the beast, with an equal and opposite counter.

At the same time, Blood-Starved maintains the standard formula of FromSoft’s boss design through a moveset that reinforces spacing and timing. If the player is unable to master the parry mechanic, Blood-Starved is surmountable through diligent use of spacing. Fast yet telegraphed melee attacks make engaging with it directly from the front infeasible without parrying, so circling around behind can be effective. The boss’s preferred response to this is to create distance between itself and the player, which effectively sets up for it’s leaping grab attack or dashing slash attack, both of which require precise timing to avoid. This makes the boss feel proactive and responsive to the player’s actions, while ensuring player’s are unlikely to escape the battle without seeing their enemy’s most deadly attacks. Circle strafing it is an effective tactic, but not one that carries no risk. In a game that relies so much on its atmosphere, this illusion of a thinking and responsive agent behind enemy AI is essential.

A hunter in a long black coat and tricorn hat steps to the side as a vaguely humanoid skeletal beast tries to bite him. He responds with a strong vertical swing of his battle axe.
The best mainly will attack forward and in front of itself, making circle-strafing very effective

Once The Blood-Starved beast has taken significant enough damage, it will begin the first of two phase transitions, marked by a screeching roar it lets loose. Starting in phase 2, its attacks will now apply poison to the player. The addition of poison to the fight accomplishes two things. One, it ramps up the tension and danger of the encounter. If you’re hit by the beast too many times, even if you’ve got enough healing to recover from the damage, you’ll be poisoned and a constant ticking clock will hang over you. This punishment effectively sets the standard of how often the player should expect to successfully dodge boss attacks without incurring major disadvantages in the future, establishing their expectations accordingly. Secondly, the building of a slow poison encourages a more aggressive playstyle, which is one of Bloodborne‘s chief design goals and hallmarks, which sets it apart from its more slow and calculating predecessors, Dark Souls and Demon’s Souls. Players in high-intensity situations will often try to ‘turtle-up’, so to speak, avoiding direct encounters so-as to preserve their resources and maximize safety. This is somewhat the opposite of Bloodborne‘s strengths as an action game, so FromSoft went to great lengths to reward proactive behavior.

A hunter in a long black coat and tricorn hat fires his pistol repeatedly at a vaguely humanoid skeletal beast as it mills about on the floor. After a moment, it screams and rears up, a cloud of toxic mist emanating from its body and its wounds.
The poison is mechanically functional in gameplay, but also very stylish and intimidating

The presence of the poison’s ticking clock communicates that your resources will be depleted if you don’t return a good amount of strikes that the Blood-Starved Beast can dish out to you, complemented by Bloodborne‘s rally system, which restores health if player damage is followed quickly by successful attacks against enemies. Blood-Starved serves as an excellent tool for engendering a more aggressive playstyle that matches the frantic and gritty nature of Bloodborne’s encounters. Phase three sees this pushed further, with clouds of poison now spewing from the beast’s wounds in all directions as it attacks. Spacial awareness becomes even more pivotal, and reliance on just one strategy becomes dicey. Players who can utilize a variety of approaches based on the situation, and do so proactively and aggressively, will find the final phase of the Blood-Starved Beast much smoother.

If a player is too risk-averse or simply not yet up to playing very aggressively, there are alternative solutions to besting the beast for the more strategically-minded. ‘Antidotes’ are plentiful from the carrion crow enemies that dot the level leading up to Blood-Starved Beast, and keeping them handy can put off the pressure from poison, if you find a moment to take one in-between dodging attacks. The pungent blood cocktail, a common item meant to distract the bloodthirsty minor beasts players can encounter, appropriately, works on the Blood-Starved Beast. It will become distracted if one is thrown, and clamor after the small traces of blood within. It’s really refreshing to see that kind of flavorful ingenuity that relies on knowledge of the game’s fiction be rewarded that way. Purely from a gameplay perspective, it might not be obvious that an item like that would work, but from a narrative standpoint it makes perfect sense. Anyway, I always appreciate these little alternate routes to victory in difficult games. Thinking around a problem is as impressive a show of skill as tackling it head on, and players should be encouraged to do so. Reward experimentation.

Blood-Starved is an extremely effective mid-level fight, I think. It’s rather straightforward with its only real gimmick coming in the form of the poison, which as I explained, fits rather well in what the beast’s design utility is. That is, the beast is at home in Bloodborne‘s oppressive atmosphere, with its oppressive combat style, and helps to reinforce a lot of Bloodborne‘s combat fundamentals leading up to the more advanced challenges that await afterward. Players who find themselves able to fight aggressively, and reliably perform parries, counters, and sidesteps, will find themselves well equipped for what comes after. You might say the Blood-Starved Beast is a ‘skill check’ in that way. Designs that focus on both teaching the player abstract technical concepts while engrossing them in the atmosphere of the world is what FromSoft does best in its boss design, and I think the Blood-Starved Beast is pretty emblematic of that.

A hunter in a long black coat and tricorn hat is struck multiple times by a vaguely humanoid skeletal beast, then backs away. He injects himself in the outer thigh with something, then dodges out of the way as the beast tries to bite him.

Hunters are killers, nothing less…

Boss Breakdown: The Ender Dragon

I had one of those weeks. You know the type. An update for worldwide phenomenon Minecraft, survival-based multiplayer sandbox game in which all the world is cubes that can be deconstructed and rebuilt as the player desires with enough energy and time, came out recently. So some friends decided to boot up a new multiplayer server, and there goes all of my free time for the week. We just accomplished Minecraft‘s nominal win condition for its survival mode, the condition which triggers the game’s strange credits sequence; killing a creature known as the Ender Dragon.

Minecraft is a game that, by its very nature does not lend itself to a win condition at all. Even in survival mode, at its core Minecraft opens itself to players defining their own goals and aspirations. Perhaps you wish to build a tall, imposing tower, or a glass city under the sea. Maybe you just want to explore and find beautiful landscapes, or dig into an enemy stronghold and steal their treasure. Maybe you want to raise animals, or start a zoo, or automate the production of gunpowder. All of these things are possible in the game, and none of them really have anything to do with, nor contribute to, the process of killing a dragon, at least not directly. Minecraft isn’t really a combat game, you see. Sure, it has combat in it, and there’s even some nuance to how it works, but it isn’t exactly a challenging set of deep mechanics one is naturally predisposed toward mastering, especially when Minecraft is so rewarding towards its other forms of play, such as digging, landscaping, crafting, and building. All that aside, it was decided Minecraft would have an overriding game-defined goal.

So met with the quandary are we, how does one design a boss for a game in which, A: combat is barely involved, and B: is primarily a game of non-combat mechanics like traversal, building, and uh, mining and crafting. The Ender Dragon is an interesting example of this idea in practice. There are a lot of cool ideas the design of the Ender Dragon utilizes to make it interesting within the context of Minecraft’s unique suite of sandbox game mechanics. If I were to make an appraisal of its overall success in this regard, I’d say the Ender Dragon is… okay. It is at once somewhat convoluted yet also simplistic, and more than a little janky. I’ll get into a little more detail, but overall the fight is fun, and though I don’t think it is the utmost pinnacle of this idea, it is one of the most popular – Minecraft is played by millions, and is in a unique position to examine this idea of boss fights or boss-fight like gameplay engagements for games that are not primarily about combat.

From a first person perspective, a person stands atop a high obsidian pillar, while shooting arrows at a black dragon made of cubes, who flies and circles in the distance. Another minecraft guy stands atop a second nearby pillar and shoots fire arrows at the dragon.

The Ender Dragon encounter is primarily a player-directed boss fight, meaning that the pace and rhythm of the fight is directed by the player, rather than by restricting rules of the boss’s environment. The player directs their interaction with the environment, rather than the other way around. The Ender Dragon is a large black winged beast that breathes fire and flies around an isolated island in an empty void. Her behavior consists of several states which she cycles through, with a preference for certain states over others depending on the status of the structures surrounding the outer edges of her boss arena, called End Crystals. The dragon will dive at players occasionally, and being buffeted by her wings can send players careening off into a lethal fall if they’re not careful. Whilst circling above, the dragon will launch fire balls that leave pools of deadly fire-like substance that persist for some time. Minecraft does not have extremely robust combat mechanics as I mentioned, and dodging usually just means moving to where the danger is not. The fire pools can be irritating, still, them lingering encourages players to dig and build around persistent obstacles.

From a first person perspective, a person digs into the side of a stone wall with a pickaxe, then further up to reveal purple sky above the dug hole. Outside the whole, several blocky minecraft guys scramble around a pool of purple fiery gas.
Burying yourself underground is a viable strategy, like some sort of gopher or marmot

So essentially what’s going on, is that these Ender Crystals want to be destroyed. Some can be sniped with projectiles, but some have protection that needs to be dug through, and to do that you need to build a scaffold up to their elevated location. If you don’t destroy these, the dragon stays in the air and restores her health. The design is suggesting the player utilize their building skills to solve the problem, which is good. Building is one of Minecraft‘s most fun and robust features, so it’s good to lean into for a boss fight. It’s a little straightforward though, there isn’t much developed knowledge of building technique needed to build up to these crystals. What’s most restrictive is simply the intimidation factor of the dragon, and outside of that there’s not much to it, as far as the end crystals are concerned.

Another strange quirk of this fight is the presence of many Endermen monsters in the area. Endermen are some of the strongest, most deadly, and most aggressive enemies in the game, but only when provoked. They can be provoked by attacking them, or by centering one’s camera on theirs. The Enderman’s relatable aversion to being perceived translates to a need for avoiding eye (camera) contact with them. I can’t speak too much for others’ strategy, but I always find myself look down at my feet during this encounter, as though my character is just really embarrassed to be there. It’s strange challenge – having to be wary of where your camera is pointing, not just where you character is standing. It does fit with the dragon being an Ender Dragon, as the Enderman monster, which can be encountered outside this fight, and isn’t all that uncommon in the overworld, always abides by this eye-contact rule. It does give the player another plate to spin, but it may feel claustrophobic and a little artificial to some. I can’t help but wonder how this fight might be improved if the designer can rely on the player having full freedom of motion with their camera.

From a first person perspective, a person shoots a bow and arrow at a black dragon made of blocks, flying around in circles below. The person stands atop a tall obsidian pillar.

In the bottom left corner of the display, a dialogue states that several allies have been killed by Endermen.
The Endermen live up to their name

One of the things I find most commendable about the design of the Ender Dragon is how open to various forms of problem solving it is, and how it accounts for the many methods a player might used to dethroning it. Minecraft offers players a huge number of tools with which to solve problems as they explore the world. For instance, the dragon usually is flying around the sky, out of reach of Minecraft‘s most common weapon, the sword. It can, of course be shot with range weapons such as arrows, but the dragon will also frequently land to rest after the End Crystals are dealt with, making it vulnerable to melee attacks. This is one solution. Since the dragon will land and stay stationary for a time, it’s also possible to load up her roost with explosives and set them off like a trap.

From a first-person perspective, a person runs up to a roosted Black dragon made of cubes and places a white bed on the ground, which then promptly explodes in their face, catapulting them into the sky.
Yup. Working as intended.

The dragon’s fire can be dangerous to those walking across her arena’s surface. Of course, Minecraft, being a game about building and digging, it’s totally possible to dig a safe series of tunnels under the arena to move around, or build up cover to protect from the dragon’s fire balls. Climbing up to reach the End Crystals poses another challenge, one that can be tackled in several ways. Shooting the crystals with projectiles is possible, but some are encased in shields that need to be removed. Building up to them with blocks is an option, or placing water (which can inexplicably be swam up in Minecraft) also works. Gravity is an ever-present threat in this encounter, so it’s wise to have some way to address it. Careful use of water can break any fall, or enchantment to one’s boots renders great falls less lethal, or you can drink a potion to fall more slowly. The point is, in Minecraft there are a myriad of ways to approach any given problem, and the dragon neatly accommodates nearly all of them.

From a first person perspective, a person is falling down the side of a tall obsidian pillar. As they approach the ground, they dump a bucket of water onto the side of the pillar, whose contents miraculously breaks their fall. The person then eats a slab of steak.
The tools of dragonslaying: steak, a four poster bed, and a bucket of water

The existence of the crystals is evidence of this. They exist apart from the dragon, at stationary, elevated points. If you want to destroy them up close, they require you to reach their elevated location, likely with building. Building during a dragon attack is a pretty compelling idea, and having to build up to your target seems like a natural fit for a boss fight in Minecraft. There is some inherent risk and reward to how one approaches building up to them. You can build straight up, or try for a more cautious staircase, or perhaps build up to one crystal, then create a bridge to the others.

Another advantage of Minecraft‘s immense suite of problem solving tools is how it frames the fight against the dragon. It is a difficult undertaking, even with a group of friends cooperating. There are a lot of hazards to look out for, so preparation is key. Minecraft is, in a lot of ways a game of preparation. Each night, hostile monsters will appear and overwhelm the unwary, but a solid roof over your head, and an ample supply of food will get you through. Bigger challenges in Minecraft harbor greater risks, and protective enchantments, armor, potions, special food, animal companions, building materials, etc. can all lighten the load. There’s a special sense of camaraderie when all of your buddies convene at a central location to swap enchanted bows and arrows, high-quality armor, and buckets of water in preparation for a great adventure. The Ender Dragon’s accommodation for all these varied modes of tackling problems is one of the best parts about it, regardless of other shortcomings. It’s the context and framing of this boss fight, I think, that creates its greatest moments.

Blocky minecraft guys in armor run around an enclosed space made of gray bricks. There are boxes, chests, and supplies piled around the room. One guy runs up a staircase at room's center and repeatedly crouches and stands.
Just messing around is truly the essence of this game

Whether Minecraft players wanted it or not, the Ender Dragon is the unambiguous overriding goal of a Minecraft ‘playthrough’, its final boss. Is the Ender Dragon a culmination of the skills and knowledge a Minecraft player accrues during their journey to the End? Well, kind of. The levels of preparation and supplies gathering players can engage in is huge in scope. There’s all sorts of stuff you can gather and build to prepare for this fight, and gathering/building is one of the most fun things you can do in the game. In my opinion, the experience is only heightened when a group of friend communally pool their resources to maximize the chances of success. The fight itself is a little convoluted, with the disparate Ender Crystal targets, apart from the dragon itself, but also somewhat dead simple in the very limited suite of behaviors the Ender Dragon can actually engage in. Having to utilize building or similar methods to reach the Ender Dragon’s crystal weak points is compelling and fits with Minecraft’s gameplay, although it’s a somewhat blunt and simplistic implementation. I find the Ender Dragon’s overall design commendable in a lot of ways, and I do look forward to the challenge as a fun communal activity with friends, but it feels under-designed in several ways. Sometimes putting a dragon boss fight into a game like Minecraft feels like hammering a square peg into a round hole. Still, I think there’s a lot to praise about and learn in regards how to approach these sorts of challenges in games that don’t primarily utilized combat as a central game mechanic.

A black dragon made of cubes slowly rises into the air as it disintegrates, a purple light emanating from it, then it explodes.

And the game was over and the player woke up from the dream…

Boss Breakdown: Metroid Fusion’s Nightmare

In honor of Spook month, I wanted to analyze the design of Metroid Fusion‘s arguably spookiest boss, Nightmare. Certainly a spooky name. I’m fascinated by gameplay that leaves a lasting impact on people, experiences that are remembered long after the game’s last play session. Nightmare seems to be one of those special few bosses that everyone remembers, if they’ve played the game he debuted in. There’s something viscerally haunting about Nightmare in particular that sticks with you. In a game full of terrifying encounters with predatory aliens on an isolated space station, he manages to stand out as this weird, horrific science experiment gone wrong.

In Metroid Fusion you play as galactic bounty hunter Samus, once again finding herself in the unenviable position of being trapped in isolation with ravenous alien monsters that want to eat her face. Unfortunately for them, wanting to eat Samus’s face is the leading cause of death in the Metroid universe, so the player and Samus will team up to claw their way through the abandoned space station to recoup Samus’s gear, destroy the monsters within, and blow the place to kingdom come.

To give a quick rundown of Samus’s capabilities, for those who have not played Metroid Fusion, Samus primarily does a lot of running, gunning, and jumping. Samus can jump high into the air and, at this point in this game, perform the space jump – where she can gain extra height in mid-air as much as she likes, so long as the jump button is pressed just as Samus begins to fall from the previous jump. Think a standard double jump, except with no limits. An infinite jump, a space jump, if you will. She can make herself a smaller target by curling into the morph ball form, with which she can also roll around in tight spaces. Samus can shoot horizontally in basically any position except the morph ball form. She can also aim vertically while standing or jumping, but diagonally upward or horizontally while running as well. Her primary weapon is a beam that can be charged up while moving then released for extra damage, and she has a limited stockpile of missiles she can fire in place of her beam. They do about as much damage as a full charged beam, but have expendable ammo.

Very ominous, the way you keep turning your sprite renderer on and off

It’s hard to describe what exactly Nightmare is. He’s some sort of awful military experiment with gravity manipulation. It a bio-mechanical monstrosity hooked up to a gravity device, and perhaps some sort of life support apparatus, sealed within with an ominous mask. He has very limited animation, with basically only a few details on his arms and *ahem* face to distinguish him. He kind of just stares in one direction and floats around, but visually it works because of the kind of character he is. He’s pretty horror-themed, with his thousand yard unblinking stare and immovable stance in one direction reinforcing this sort of awful, emotionless terror-machine.

The Nightmare boss fight is made up of three distinct phases that seamlessly transition from one to the other linearly as the Nightmare creature takes damage. As is often standard for 2D action games, Nightmare’s behavior pattern is actually rather simple once you break it down. In the first phase, Nightmare will only do two things. First, he’ll fire a salvo of laser projectiles that move horizontally in a line from his arms. Several are fired at once, forming an obstacle that is just high enough for Samus to be able to jump over, if they’re fired near the ground. This is complicated by the second thing he does; he will track Samus’s vertical position with his own, levitating up and down to match her “y” position on the screen. It’s not one-to-one though, Nightmare overshoots Samus’s position, and if she quickly changes her vertical place, Nightmare will have to take a moment to reorient itself as a result.

This movement creates the sense that Nightmare is an intelligent predator going out of its way to aim its deadly lasers at Samus, although in truth they aren’t aimed as such. Nightmare is repositioning its entire body to fire at Samus. This overshooting vertical motion is a simple and effective way to convey the illusion of intelligence in enemy AI. An enemy that perfect lands its shots every time, with no room for error is even simpler to implement, but it’s not very satisfying to fight against. By having Nightmare overshoot, he seems more alive, with the capability of making error, while staying motivated and on target – he tries to shoot Samus, but does not do so perfectly. Once the player can properly manipulate Nightmare’s movement, they can defeat him much more easily. One could even say that Nightmare’s movement is an extension of the player’s own as Samus. It’s always a response to how she moves, that is then disrupted by the lasers which fire on their own time, beyond the player’s control. Having mechanics interact like this instantly multiplies the number of situations that are possible, and this simple interaction alone drives the entire first phase of the fight.

There’s one more complication, however. Nightmare is immune to Samus’s weaponry on most of his body, vulnerable only at one specific weak point – his gravity device. Dodging Nightmare’s attacks in the first phase is not a terribly daunting task, as again his movement is totally lead by Samus. The position of his weak point forces you to try to manipulate him in a certain way, though, and this may put Samus in harm’s way. It’ll be easier to understand how this work by understanding how Nightmare is shaped:

Very definitely NOT shaped like a friend

As you can see, Nightmare is made up of these four primary parts, very approximately outlined here. None of the areas marked in green can take damage, but the red gravity device can. So now first phase is a game of landing your shot in that small space between his arms, which will otherwise block your fire. Seems difficult, but is thankfully alleviated somewhat by a beam upgrade Samus will have by this point in the game, which makes her shot very wide, so damaging Nightmare requires a precision, but not pinpoint precision shot from Samus. This also means hitting Nightmare is much easier with the charge beam than with missiles, ensuring the player is taking some time to charge up, and therefor interacting with Nightmare’s attack pattern as the fight goes on, none of his mechanics can go ignored. To access this weak point, Nightmare needs to be high enough in the air, and thus the ladder on the back wall Samus can use to goad him into exposing himself. This little scenario will also give the player ample time to observe and learn about how Nightmare’s movement works. If the player can successfully repeat this cycle a few times, Nightmare will activate his gravity field, and we enter phase 2.

Shaped like an enemy, even

Nightmare’s gravity field makes Samus heavier, causing her jump to get a lot less airtime, and her running movement to be a lot slower. At the same time, Nightmare will be encroaching on Samus slowly, characterizing a very off-kilter and haunting vibe. Nightmare does not track Samus’s position here, but rather simply bobs up and down a short distance. This happens rhythmically and regularly. He notable stays in his higher position for a longer time than his lower position, designed such so that the player has time to aim a beam shot at the gravity device. His lasers now fire only two at a time, so Samus’s shorter jump can clear them, but they follow their own regular timer that is desynched from Nightmare’s movement, meaning they can fire at any vertical “Y” position, so the player will have to duck or jump the lasers on the fly. This shift to a more reaction-focused mechanic reinforces a sense of being on the backfoot, of the terrifying creature closing in you, literally forcing you into a corner.

Similar pattern, new context

The method of attack remains the same here, but it’s re-contextualized, as Nightmare now moves of his own accord, meandering around like a zombie, rather than following your lead. He reminds me of a horror-movie monster, the way he sort of just vaguely shambles toward you. The fight remains simple, but the distortion of the environment, the ooze dripping from his eyes, and the ominous humming of his gravity device, along with the subtle shift of the mechanics toward reaction-based gameplay really sets the mood. The aesthetics do a lot of work here, creating a building tension going into the third face, er, I mean phase, which starts with..

AAAAAAH DIE DIE DIE DIE DIE DIE DIE DIE DIE DIE DIE DIE DIIIIE

HOLY mother of god what IS that!? Augh, yes his mask comes off to reveal this grotesque melting abomination once you’ve destroyed the gravity device. At this point Nightmare will gradually move toward you, firing lasers in a new much more aggressive pattern, forcing Samus off the ground. If Samus tries to jump over Nightmare, he will fly off screen then back on in an attempt to ram her. Nightmare is responding to Samus’s movements again. It’s more obscure and aggressive, but still predictable. Once you understand that bosses like Nightmare are only responding to their circumstances (aka you, The Player), you can predict how they’ll react and use that to your advantage, and this applies to pretty much any AI enemy. Incidentally, this is largely how competing against real people in games works, too, although they might be a bit smarter than Nightmare. At any rate, he’s now vulnerable to missiles, so blast his exposed face to smithereens. It’s a lot easier to damage him in this phase, so it’s simultaneously cathartic as his increased aggression continues to build tension. The extra room and freedom to move about more of the arena creates a sense of a shift in tone. Samus is now in a position of greater power, and Nightmare a position of greater desperation, to match his screeching unmasked face.

Oof

It’s worth going over here a kind of ‘soft’ phase 4 for Nightmare. Nearly every boss in Metroid Fusion, once defeated, releases its Core X, a parasitic creature that contains some of their power. Samus must defeat this as well, before she can breathe a sigh of relief. The Core X is a pretty simple floating target that can be taken down with a few missiles. Beam attacks don’t damage it, but they do release some health and ammo restoring items. The Core X’s behavior is to simply follow Samus’s current position, and move towards her to ram her. You’ll notice it uses that same ‘follow but overshoot’ technique Nightmare employed, except in both the horizontal “x” and vertical “y” positions. If you know to look for it, you’ll see this mode of movement in AI design everywhere. I always found these Core X encounters a very interesting kind of denouement to boss fights, where there’s still some danger, but not nearly so much, as the heightened tension eases out. It’s a pretty satisfying cap off to hard encounters, and not many games do anything similar. It’s unique.

Wobble wobble wobble

It seems to be the case that Nightmare’s design is intended to exercise all of Samus’s mobility options. The presence of a ladder on the back wall gives the player easy access to the air above Nightmare for some evasive space jumps, certain Nightmare attacks are best evaded by Samus’s famous morph ball, and a command of Samus’s ability to fire diagonally while moving gives a huge advantage in this fight. Nightmare is one of the first bosses in Metroid Fusion that really pulls together a lot of Samus’s various capabilities, and, even though he’s rather simple and straightforward, he does a great job of it. He marks the beginning of the endgame sections of Fusion, and can be a bit of skill check for people, so they may very well get stuck on him for a time. This coupled with the outstandingly horror-filled atmosphere that follows from his horrific design, reinforced by AI behavior reminiscent of a lumbering horror villain, and you’ve got a recipe for an extremely memorable encounter.

This thing is out of control. Hurry before it destroys the entire station…

Boss Breakdown: Dark Riku at Hollow Bastion

Kingdom Hearts does something interesting with Riku. He’s set up at the beginning of the game as the player and the player character, sora’s, rival through gameplay and narrative alike. His initial early-game boss fight establishes Riku as the primary barometer for the player’s capabilities within the game’s systems. That’s the set up. The punch line, coiled and poised to outstretch and clothesline the player at mach 2, is Riku’s final boss fight – Dark Riku, awaiting at the ominous castle of Hollow Bastion. Regular Riku is difficult, way more difficult than might be reasonable at the very start of a game. However, he’s optional and therefor more of a story beat for both the game’s narrative and the emotional experience the player is being primed for. Dark Riku is not optional, and Dark Riku is levels above his predecessor. This boss also represents a notable difficulty spike and more or less fulfills the role of narrative climax to Kingdom Hearts, and that aforementioned emotional experience for the player themselves. People remember this boss fight. There’s something about it that sticks with you. It leaves an impact.

Growing up is finding Dark Riku impossibly cool, cringe, and then unironically cool again, in that order.

Dark Riku is a fight divided roughly into three phases. Dark Riku, as with the Destiny Islands Riku, has a pretty modest repertoire of actions to use against the player character, Sora. Riku fought defensively and passively on the Destiny Islands, almost always awaiting the player to approach or take some action. His voice lines were goading and taunting, meant to lull the player into making hasty mistakes. Dark Riku doesn’t wait. He may pace around for a few seconds before attacking, but will go on the offensive on a hair-trigger. At this point in the game, the player will have access to new defensive options compare to the Destiny Islands encounter; the block and dodge roll. They will also be able to heal themselves with cure magic.

Like clashing, in which Sora negates an oncoming attack by timing one of his own attacks to hit at the same time, the block negates incoming damage and sets Sora up to counterattack. The timing on a block is much more forgiving. However, if a block is whiffed, that is, if the block is used when there’s nothing to block, Sora has to spend a lot more time returning to a neutral stance than if he had just attacked, so there’s an interesting tradeoff between using attacks as defense and using a block as defense. One is more reliable, but more risky in the event of a failure. Using cure magic to restore Sora’s health will also have become a core mechanic by this part of the game. Sora takes a lot of damage and his health is not expected to hold out over an entire battle. The player is expected to keep on eye on their MP resource, which determines how often they can use magic. The MP bar is also another design tool for encouraging the kind of aggressive action that Kingdom Hearts is going for, as the primary way to restore MP is by attacking. Playing defensively will only get you so far. Using cure at an inopportune time can also mean getting interrupted, so the player must be aware of their surroundings and situation to heal. Riku is constantly prepared to counterattack, meaning the player will have to be more aware of how Riku will respond to certain actions, predicatively.

Magic is fueled by the power of VIOLENCE

For example, one of Dark Riku’s attacks is a medium-ranged overhead swing. The attack can be easily blocked or clashed and then followed up on with a counterattack for a pretty safe way to deal damage to Riku. Riku likes to use this overhead after dodging or blocking Sora, so the fight will reward consciously keeping track of Sora’s actions. Being able to switch from attacking to defending and back to attacking is the surest way to deal damage without being hit. One can goad Riku into dodging, which will likely trigger this overhead attack, which can then be countered. That kind of forethought is what’s being encouraged here. For a player, being able to successfully predict and counter enemy moves is a huge signifier of personal prowess, so it’s advantageous to a combat system to be predictable to a degree, if making your player feel powerful is a goal.

This attack-counterattack pattern Kingdom Hearts settles into creates fight scenarios that are both mechanically and visually dynamic

Another of his basic attacks is a two-hit combo that can close the distance between himself and Sora. It comes out fairly quickly, but it’s most often used when there’s some distance already, so the first hit will rarely make contact. It’s more of a tool for Riku to discourage simply running from him, but like with the overhead it can be blocked or clashed, then countered, meaning it’s also another tool for the player to direct the fight and indirectly control Riku’s actions to making openings. That’s the gist of it, really. If you want to make a really challenging boss fight and trust in the fun of your combat system, focusing on fundamentals makes for a solid foundation. In phase one Riku is just a very aggressive, very damaging, and responsive sword fighter. Understanding of the various defensive and offensive options available to Sora will carry the player far through this fight, but Riku still has a few tricks left.

Like Destiny Islands Riku, Dark Riku may take a defensive stance and taunt Sora, though this time with his more villainous tone. This time getting behind him won’t work, as Riku will always turn to face Sora, so taking his taunt with an attack is the only option outside of waiting. Fortunately, Riku almost always responds to this with an attack that can be easily countered with a block. If Sora gets too close to Riku, he’ll do a fast spin attack to help maintain his optimal distance. This helps keep the player in danger, so to speak, which helps keep the fight exciting. This quick attack is blockable, but not easily counterable.

Riku’s third attack in this phase is the helm splitter, where he jumps high into the air and comes down with a magical shockwave on the ground. This attack is unblockable and deals significant damage, so dodging out of the way with a roll or out-ranging the attacking are the only options. Dark Riku has a few of these unblockable attacks, most likely intended to encourage the player engaging with a fuller breadth of the combat mechanics, such as the dodge roll, blocking, jumping, and clashing. Unblockable attacks don’t have a universal signifier in Kingdom Hearts, but it does a pretty good job of making them intuitive. Riku’s helm splitter is quite a bit more exaggerated than his other attacks in animation, with him jumping very high into the air before coming down. It’s obvious straightaway that it’s more powerful than his other moves. The energy his shockwave creates is given a lot of pure white in its color profile, and any attack he or his derivatives use from here on out with similar visual details are likewise unblockable.

The big jump both warns of the impending danger, and gives ample time to dodge out of the way, which I… fail to do, here

Once Dark Riku has taken a bit of damage, the warm up is over. This is phase 2. From here on out, he’ll occasionally empower his weapon with a dark aura, adding some nasty new effects to his attacks. The art and design assets of this empowered state are really just overlays on the basic behaviors he already has. It’s very efficient design, that wouldn’t have demanded too much production overhead, and yet expands the fight in very interesting ways. Every time he does his two-hit gap closer while empowered, he’ll launch an energy disc ahead of himself, which can damage Sora, or even set him up to be combo’d by followup attacks from Riku. Riku’s overhead will now also launch some unblockable energy, in two lines out to either side of him. The way these two attacks in particular are designed utilize a common trick in action games with a dodge mechanic like Kingdom Hearts. By extending out the danger area of these attacks in lines, they require a greater degree of fine control from the player while dodging. Usually, dodging just vaguely away from danger is sufficient, but if you dodge to Riku’s side during an overhead, or directly away from him during a gap-closer, you’ll get hit. Closing off specific vectors around the enemy during their attacks like this tests the player’s ability to dodge in specific ways, a straightforward step up from what is usually expected of a dodge.

The game is funneling Sora to certain positions with attacks like this, keeping Riku front and center.

During his empowered state, Riku is extremely aggressive, moreso even than before, and will barely give the player a moment to breathe. During this state, healing is very risky, as is going on the offensive, so the challenge becomes figuring out what the player can accomplish that won’t lead to their own defeat. Riku’s gap closer is still blockable, as are the projectiles he creates from it. So essentially, Riku’s empowered state has an unblockable attack that is most effectively dodged, and an attack that is most effectively blocked, so that pattern of encouraging the player to utilize a variety of their tools and maneuvers is reinforced. Riku is much less likely to flinch during his empowered state, but it can still happen, so the player must keep an extremely sharp eye out for their opportunity to deal some damage. The longer the fight goes on, the narrower this opportunity becomes, requiring the player to take greater and greater risks to deal damage, naturally elevating the tension as it reaches its crescendo. The narrative in this fight is meant to be an underdog overcoming his greatest rival consorting with pure darkness – a symbol of overwhelming power. Demanding persistence of the player in knocking down Riku’s increasingly ironclad defenses reinforces this feeling.

Persistence is key in turning Riku’s attacks against him

Riku will finish out his empowered state with an empowered helm splitter that unleashes a wave of unblockable energy bursts. As with any enemy in Kingdom hearts, the key to avoiding this attack comes from understanding its behavior. The attack itself sort of acts like a little mini-enemy in that it has its own logic to how the energy bursts appear. They will surround Sora, and appear at semi-random locations, but there’s a bit of a predictable method to it. They seem to predicatively try to lead whatever direction Sora is currently moving, so quick changes in trajectory as Sora dodges drastically reduces the likelihood Sora will be hit. Figuring out your enemy’s behavior through observation is one of the primary skills Kingdom Hearts tries to impart, and that can also be applied to individual attacks like this.

Notice the appearance of energy bursts are clustered around where I’m facing, just ahead of me, but slightly offset

Riku cycles between his empowered state and the attack pattern from phase 1 until he is reduced to low health. Now the final phase begins, and with the player’s competence in regular combat well-established, the game shifts somewhat to introduce feelings of desperation and survival. Riku will permanently enter the empowered state, and the player will now have to constantly deal with his empowered attacks while whittling down the last of his health. The tension is raised and the stakes are at their peak – be defeated now and lose all that progress you made fighting Riku. The player’s ability to manage risk, defense, and offense is pushed to its limit.

Every so often, and with increasing frequency as his health is reduced, Riku will initiate his ultimate attack. This is one of the earliest examples of such show-stopper, set-piece, mega powerful, screen-subsuming attacks that will become a Kingdom Hearts favorite tradition. First, how does it work? Riku will raise himself into the air, announcing his intention, then fly straight at sora in a dashing attack. A series of identical dashing attacks, this time each forming a part of a rotating danger area around the arena happen in rapid sequence. Finally, Riku does an even more empowered version of his helm splitter, sending energy bursts outward from the center of the arena towards the edge. Like the previous empowered helm splitter, the game is asking of the player here to recognize the behavior of this attack, how it works, and formulate a response. Since this ultimate attack is constituted of mostly things we’ve seen Riku do before, it also acts as a capstone to the fight’s mechanics.

Give me everything you got, jerk!

The final step of the fight is, essentially, trying to squeeze in a last few good hits against Riku. You’ll notice he’s totally invulnerable during his ultimate attack. He’s also prone to using it very very frequently when his health is almost spent. I have mixed feelings on this. On the one hand I’m wary of ever making a boss completely invulnerable like this when up to this point the fight has been so open ended and player-driven. Riku is never invulnerable otherwise, even if it’s not always wise to attack him, so it can be a somewhat frustrating disruption, especially when he is using it near-constantly towards the end of the fight. I understand what the intent is here. This attack is the most difficult thing to defend against that Riku can throw at you, so it makes sense to use it consistently to up the tension at the fight’s climax. The experience of having only a small window to deal that last tiny bit of damage you need is also a compelling one – it gives the feeling of the fight becoming more and more desperate. Still, the attack is dangerous enough that it feels as though Riku didn’t need to be unassailable during it. The added danger of trying to damage Riku while he’s flying around with this ultimate attack could even be quite compelling, itself.

Support her head and neck, ya dingus

When this all started, Kingdom Hearts went out of its way to really build up the rivalry between Sora and Riku. It was a rivalry built on a childish sense of possession of their mutual friend Kairi, though that was all merely a pretense to air their own senses of inadequacy toward one another. The rivalry was only ever really about Riku and Sora. They both care deeply for Kairi, but Kairi and her feelings weren’t the real reason they fought. Now, the situation is turned on its head. Riku’s will is suppressed, the real Riku is nowhere to be seen in this dark reflection, and Kairi is in imminent danger. There’s no rivalry anymore. Sora no longer fights for himself, but only for the safety of his friends, both Riku and Kairi. The Dark Riku fight paints a stark contrast to the idyllic playful world our characters once found themselves in, forcing them to grow past the irresponsibility of their rosy childhood to own the consequences of their actions to this point. With the battle wrapped up, Riku is left to deal with the darkness he’s unleashed, and Sora has to be willing to give up his heart, his ego, to save Kairi, proving her well being more important to him than his own.

Ah Sora, always the martyr

The Dark Riku boss fight is incredibly memorable. Anyone who played Kingdom Hearts in their childhood will tell you as such. It’s an excellent culmination of the skills one builds up through a long RPG like this, while capping off the central emotional through-line of the game, established all the way back in the opening minutes of the experience. It’s a great fight, but there are some pretty notable issues I should mention. Most egregious, is how the relatively small boss arena interacts with the game’s lock-on feature. The lock-on is meant to keep your enemy front-and-center for easy viewing. While dodging around Riku’s flanks, the camera has to spin and can often get caught on surrounding walls in such a way that Riku will be pushed off-screen, essentially hiding information from the player through the mechanic that is meant to do the opposite of that. It’s a pretty significant technical hitch, and a shame that it can be so readily reproduced. There’s also the repeated periods of invincibility Riku enjoys near the end of the fight, which as I said do accomplish some of the fight’s design goals admirably, but creates a bit of unnatural frustration I feel could have been designed around. While I find what is blockable and unblockable in his fight rather intuitive, that’s a bit of a gray area and I could see it unduly confusing some people. Still, all that emotional catharsis in finally defeating Riku at his best, and seeing how Sora’s matured could make one overlook some of these flaws. I mean who could forget Donald Duck tearfully running to Sora’s side as he disappears.

I told you Donald was the key to all of this

Overall, I think it’s pretty clear why this one fight sticks so strongly in people’s minds. It’s not just the narrative, nor is just that it’s incredibly hard. It’s that synthesis of gameplay and story – action and emotion that really cements moments like this for people. The emotion is heightened by the interactivity, and the interactivity heightened by the emotion.

He sought a way to cross over into other worlds. And he opened his heart to darkness…

Boss Breakdown: Riku on Destiny Islands

Today on Boss Breakdown I’m going to be delving into the wonderfully weird world of Kingdom Hearts to examine an optional boss encounter that comes very early on in the game – the player’s ultimate rival, Riku. Kingdom Hearts is an action RPG developed by Square Enix. Combat in Kingdom Hearts is a fast-paced series of sword battles (well, keyblade… yeah, we’ll just say sword battles) that take place on the ground and in the air with over-the-top fantastical feats of acrobatics and agility. It’s very much larger than life, exaggerated, and full of charm.

The player fills the role of the young dreamer Sora, a resident of the Destiny Islands, a vague sort of childhood-paradise world where teenagers enjoy their seemingly endless summer vacation racing, play-fighting, collecting seashells, and imagining the world outside their own. Sora’s got two best friends – Kairi, a creative, sassy yet kind-hearted girl and Riku, an abrasive, competitive, and contemplative boy. The Destiny Islands act as a safe tutorial space for Kingdom Hearts where the player is free to explore the game’s movement systems without fear of battle unless they seek it out. Riku has an optional boss fight in this early stage and it’s very notable for what it accomplishes. I wanted to talk about Riku particularly for how strong the gameplay-narrative aspects of his fight’s design are. This first Riku boss fight on the Destiny Islands is very basic, comes very early, and is seemingly innocuous. You wouldn’t think it has huge implications on the rest of the game, but there was clearly a lot of thought put into how this early game challenge would fit into the overall experience.

Also Donald Duck is involved, somehow, I understand

Riku is absolutely terrible, at this point in the narrative. I don’t mean to say I dislike his character, in fact he’s very effective in his role. From the moment you meet him he’s a driving force for the player, motivating them to explore the combat mechanics. He teases and condescends to Sora, but it’s all innocent enough. It feels like friendly banter. Some red flags start to go off when Riku and Sora challenge one another to a foot race. Surreptitiously, outside of earshot of Kairi, Riku puts up a prize, a very symbolic and intimate moment with Kairi, as a bet to be won by the victor of the race. It’s somewhat chilling. Sora doesn’t even have a chance to really respond to the rather untoward proposition before the race begins. The player has a single chance to establish who wins this “bet”, though the result is inconsequential, as Riku will play it off as a joke. It certainly doesn’t sound like he’s joking when he first brings it up, however.

This is like wagering her hand in marriage, basically

There’s some clear tension building among this group of friends, and Riku seems to be the source of it. At a later point, Kairi will offer to escape the island with just Sora, the two of them leaving for adventures together, implying Riku would be left behind alone. Sora doesn’t answer quickly enough, and Kairi too plays off her startling proposal as a joke. In actuality, with the benefit of hindsight, Riku doesn’t act all that terrible generally. Perhaps a bit full of himself, but he does show a genuine camaraderie with Sora and Kairi. It’s isolated moments like that proposition at the footrace where an inner darkness peeks through from him. He says hurtful things from time to time, but he’s ultimately a confused teenager from a very narrow world. Before all this though, Riku strongly establishes himself as the de facto leader and strong, wise “elder” of the group (he’s only a year older than Sora and Kairi, but still). He taunts and brags to Sora constantly during encounters with him, demeaning his abilities in a sort of ribbing way, but also the kind of way that gets under your skin and moves you to prove him wrong.

Look at how perfect it is, that text field was MADE FOR THIS

As a young kid, I really did feel like Riku was driving a wedge between Sora and Kairi. It invested me in this microcosmic little world, with Riku as our small-scale antagonist. Riku is positioned that way by the gameplay, as antagonistic. He’s meant to drive you, as the player, to better yourself through game mechanics to better Sora. You feel the same rivalry Sora feels with Riku , and you’re suffering the same way Sora is when Riku beats you into the sand. And he will. A lot. Riku’s boss fight is incredibly overtuned for what I’d consider to be an appropriate early-game boss fight, under normal circumstances, but that’s why Riku is an optional fight. I say optional, but given the aforementioned story context, you’d be hard pressed to find a Kingdom Hearts player who would not at least attempt to defeat Riku a few times.

Me too Sora, me too

You can challenge various characters to play-fights with wooden swords. Please ignore the fact that beating each other with wooden weapons would still be horribly dangerous, as this is anime land where human children can effortlessly bound twenty feet in the air, do three backflips, then deflect a flying bullet out of the sky with a sword. It’s fine. These are the only real sources of combat available to the player in this tutorial stage, as the story isn’t ready for monsters to be popping out just yet. They act as a sort of optional tutorial set, with each kid you can challenge specializing in teaching some aspect of the combat system.

How humiliating… for them

Selphie teaches the player how to clash with an enemy’s weapon. Tidus teaches you how to outmaneuver a melee attacker. Wakka will teach you how to deflect projectiles. Riku is the fourth and final kid you can challenge, and he’s here to teach you how to lose. I’ve at times heard individuals deride Kingdom Hearts as a button masher, or in other words, implying the gameplay is overly simplified to the point of being trivialized by mindlessly mashing the attack button. I could go into detail about that misconception, but essentially if you have that experience, you’re playing on too low a difficulty setting for your level of skill. Riku’s boss fight is here to prove that to you.

Riku’s arsenal of maneuvers and attacks is pretty modest at this stage, but very effective. The player too, this early in the game, does not have very many options. Sora can run, jump, or attack with a 3-hit melee combo in the air or on the ground. Your defensive options are severely limited, you don’t even get your proper block or dodge roll until later, so using good positioning is your only way to avoid damage. That, and utilizing Kingdom Hearts‘ delightfully intuitive weapon clash system, which will nullify enemy attacks if Sora matches them with a well-timed attack of his own, deflecting the attack with a satisfying *clash* sound. This system simultaneously rewards attentive observation of your enemies’ attacks for proper timing and promotes aggressive attack-happy play, which makes the combat a very frenetic and fast-paced system. Attacking is, in a way, also a form of defending.

Ahh youth… smacking around your buds with two by fours like god intended

Riku has a fast melee attack that he’ll bring out if you get too close, teaching the basics of how enemies behave in this game. They mostly respond to the player’s position. They can be proactive, but their behavior is extremely contingent on Sora’s position relative to them. If sora dodges this attack but stays close, Riku can follow it up with a second, similar fast and close-ranged hit. At a medium distance, Riku can stab out his sword for a slower but longer-reaching attack. Riku also has a small spinning attack. Observing what Riku can do will also teach the player what Sora can do, as their arsenals at this stage are very similar. The attack button in Kingdom Hearts is contextual, and will activate a different attack depending on Sora’s relative position to his target, and whether or not he’s airborne, similar to Riku! These fast attacks of Riku’s can be clashed, which may stagger him and leave him vulnerable to a counterattack. This is one of the basic methods of dealing damage to enemies in Kingdom Hearts.

Simple so far, right? Well that’s just what Riku wants you to think. In Kingdom Hearts, because battles are so overwhelmingly player-directed, enemies keep track of how much they’re being hit by the player with something called a revenge value. This invisible numerical value, once it reaches certain thresholds, changes the behavior of enemies, causing them to retaliate, or use super moves. Riku has no super moves, but his favorite form of retaliation is so deadly it might as well be classified as a super weapon. If he feels he’s taken too many hits too quickly, Riku will lean onto his back, and point his feet toward the air, before kicking up into a standing position, clobbering Sora if he’s standing in front of the kick’s path. This maneuver deals devastating damage, and has a very tight window within which the player can react and move out of the way. Riku loves to do this in the middle of Sora’s attack combos. Riku’s revenge value is very sensitive, and he’ll start doing this if Sora’s hit Riku with even one full attack combo. The player can stop Sora’s combo, but only between attacks. If you push that attack button one too many times, Sora will be locked into his attack animation, and it’ll be too late. Button mashing is the easiest way to get absolutely demolished by Riku. I think it was very clever to key into this player behavior specifically as a bad habit worth shaking, if one ever wants to be as good at this as Riku. You’ve got to think, look, and listen carefully before just wildly swinging your sword.

prepare to experience a lot of THIS

If you do keep an eye out though, Riku’s greatest weapon can become your greatest weapon. Riku is unable to retaliate if you hit him just as his kick-stand maneuver ends. If you see it coming, you can step out of the way and respond with a free attack combo, punishing him. If Riku feels he’s in a bad position, or has been hit too many times without landing hits of his own, he may make a short, grounded dash movement to close the distance, or jump into the air to make distance. Riku is unable to attack in the air, nor can he retaliate in the air. The timing is tough, but if you can land an aerial combo on Riku while he’s jumping, he has no recourse. Giving Riku no aerial options at all helps the player realize that aerial and grounded combat have distinct differences and that enemies will react differently to those approaches. Knocking enemies into the air will tend to make them more vulnerable, so this is good knowledge to have.

Riku’s final trick is his taunting. He’s constantly, constantly, goading and heckling Sora and by extension the player about how they’re scared or not good enough. If you act in haste, he’s likely to clobber you, so this really is a game mechanic of sorts. It’s easy for people to tunnel vision in games and make mistakes, which is the main thing this boss fight is trying to teach you overall. One of Riku’s taunts is accompanied by a blocking motion. Any attempts to attack Riku from the front during this extended block will fail, and after a few failed attacks, Riku will hit Sora with a powerful overhead strike. This may at first seem like an impasse where the player simply as to wait for Riku’s taunt to end, but in actuality, if you get behind him, Riku will realize his block won’t work, and he’ll jump to a new position. Given what we’ve learned, and how predictable this behavior is, the player can learn to catch Riku out of this reliable jump to turn the taunt against him. Cool!

I can feel genuine, seething rage start to rise from the depths of my heart. How authentic!

Amusingly, the game takes a moment after each and every confrontation with Riku (you can challenge and re-challenge him to races and fights as much as you want) to highlight your win rate against him, with Sora musing on the current “score”. A fresh player is likely to have lost to Riku many, many times by the time they beat him, if they beat him. The game does not want you to forget that Riku is better than you at this. The race alone, which you are required to run at least once, is likely to give Riku at least one win over you, as the race is also extremely difficult to a new player. The game sets the player up for failure when it comes to beating Riku, and engenders the same sense of dissatisfaction and perhaps inadequacy that Sora feels toward his older counterpart. The player, like Sora, is motivated to improve and master their combat skills as Riku himself becomes an implicit motivator.

Y-yeah, yay. Woo-hoo?

It is the game designer’s job to make the player motivated to want to play their game, to spend time in the world they’ve helped to build. Obviously, a designer needs to motivate the player to do so. There’s explicit motivation, which promises the player rewards and treats for doing so, outside motivation. These are useful tools, but potentially much more powerful are the inner motivations whose rewards come from within the player. Fun, satisfaction, and investment in a story are all implicit motivators. These are ephemeral terms, difficult to pin down, which is why when they are designed for effectively it’s so remarkable to behold, and worth studying. Riku will destroy a new player, repeatedly. However, as beating him is entirely optional, this is unlikely to demoralize the player, who is allowed to continue the story, but now carries this internalized rivalry with Riku. One day, you will be able to beat him, the game implicitly promises. Maybe not now, but continue playing, continue improving, and one day, you will. You might see this technique used in games often, if you’re on the look out for it – establish a rival or mentor that both the player and player character cannot overcome, setting the player up to go on a journey of self-betterment alongside their protagonist.

Ow, my pride

This player-protagonist harmony, where the player feels analogous feelings to your protagonist, is an excellent method of immersing the player in a game world. If the player has nearly the same motivations and emotional responses as the character they are playing, they’ll find it much more natural to put themselves in their shoes and empathize with them for whatever wild scenario you can dream up. This is the real power of video games as a medium. It’s the only form of media where the player can really be part of the story, explicitly, emotionally, mechanically, so I’ve always believed one should lean into that. Gameplay itself can be a form of storytelling.

But this is only part of the story. So Riku is set up as this big imposing physical and emotional obstacle for the player, as well as for Sora. They’re ready to tackle it together. But what next? Where does this story go? You may have heard that Kingdom Hearts‘ narrative gets complicated. People like to exaggerate, but for the sake of simplicity I think next time we’re going to skip ahead a bit and see where this path we’re on leads us, in regards to Sora and Riku. This is, after all, not the only Riku boss battle in this game. Players familiar with Kingdom Hearts will know the others well. In part 2 of this Riku Boss Breakdown, we’re going to take a look at the infamous Dark Riku boss fight.

They’ll remain a part of each other’s lives, no matter what…

Boss Breakdown: Artorias The Abysswalker

Welcome to Boss Breakdown! I wanted to do a series of posts specifically about boss design and the particulars of some of my favorite bosses (as well as perhaps some not-so-favorite ones that are otherwise notable to me). It didn’t take long for me to think of what boss I wanted to talk about first…

What an entrance.

We’re going to start off strong with Artorias The Abysswalker from the original Dark Souls. He’s one of my favorites and an excellent study in readability for enemy design. I’m going to go over his general behavior, as I can observe it, then breakdown a number of the specific attacks and moves he can employ against the player. I’ll wrap up by sharing my analysis of what the design goals of this fight were, and how well the final design accomplished them. Some mild spoilers for Dark Souls are to follow. For context, Artorias the Abysswalker is a legendary and divine knight within the Dark Souls world renowned for his heroics and saving the land from a menacing force called the abyss. You happen upon him crusading against abyssal creatures when he turns on you and attacks like a madman. Dark Souls is an action RPG about clashing sword, spell, and shield against various gods and monsters, and thus you must likewise do so against Artorias.

Even with my experience, if I don’t focus on my timing I’m likely to get clipped by his large attacks.

Artorias is a knight, albeit a possessed one, and he fights like a knight. Mimicking many of the behaviors of other humanoid enemies in Dark Souls, Artorias likes to circle around you slowly, as if sizing you up. He’s aggressive, but doesn’t leave you with no breathing room at all. He seems to cycle between states of high-aggression, letting loose a deluge of attacks, and low-aggression, where he’ll be more reactive and less proactive. If in his reactive state, it’s dangerous to engage in maneuvers with a lot of time investment like healing. Enemies in Dark Souls generally do not like it when the player tries to heal, and will move to stop them more often than not if they are able. This is especially true of bosses and especially especially true of humanoid late-game bosses like Artorias. I suspect there is a special behavior baked into his AI to make Artorias lose his cool if he sees you try to slip in a quicky sippy of your healing Sunny-D potion. Healing is not meant to be a free action in this game, rather its something you must do while your opponent is occupied, in order to accomplish it safely. You must take a risk to heal, as healing is, ultimately, correcting a mistake you’ve made to begin with. The added risk is your payment for taking a hit. If you’re hugging Artorias too close he may have trouble hitting you with his wide-arcing attacks, so to counter this problem he may roll away from you to get some distance, or use an attack that allows him to reposition himself like a leaping strike. He also has a dodging side-swipe combination to really dissuade the player from trying to confuse the AI by getting too close. Artorias is most effective when facing the player, so if the player tries to get behind him he’ll splash some dark muck their way. It’s one of his quickest attacks and, proportionately, does the least damage. This move is more an inconvenience than anything, and really meant to just gently discourage getting behind Artorias too often, as it is disruptive and difficult to react to.

NO ENERGY DRINKS ALLOWED IN THE ABYSS! We only drink BLACK COFFEE here!

Most of Artorias’s attacks are slow and sluggish, objectively speaking. He has some extremely generous telegraphs to his attacks, some of which can be almost as long as a full second, while the average human reaction time is at around 250ms, or one quarter of a second. This is purposeful. Artorias is meant to be difficult, but despite a somewhat exaggerated online reputation, Dark Souls always aims to be fair in what obstacles it throws the player’s way. Clearly communicated telegraphs seem to be a priority for the enemy design in this game, and this seems especially true of Artorias. Obstacles simply tend to be more satisfying to overcome for players when they are clearly conveyed, even if they are difficult to overcome, and in an action-based boss fight this means effective attack telegraphs.

Notice how Artorias really drags his sword behind just before he swings it. The sword is so massive it’s very easy to track with the eye, especially with how the animators framed Artorias’s poses relative to the player’s position. They knew Artorias would be usually staring straight at you from the center of the screen, so they knew how to best frame him such that his actions are very traceable by the player. This is important, as a boss that is difficult to read can often mean a frustrating and dissatisfying fight. Most of Artorias’s attacks do not have very strong tracking, meaning he does not aim himself in 3D space at the player with perfect accuracy. Obviously, if tracking on an attack is too strong it becomes impossible to outmaneuver. Artorias’s sword swings have just enough tracking to make casually walking out of the way an unwise evasive tactic, but not nearly enough to overtake the speed of a well-timed dodge roll.

Artorias slowly drags the sword into position and swings it over his head, but then slows down the movement of his arm right before he strikes to make sure you can see his sword about to come down, its silhouette clearly defined.

That dragging action of his sword also communicates a part of the narrative; this Artorias is being controlled by an outside, corrupting force. He moves almost like a puppet, as though his limbs don’t act in concert with the rest of his body. Using narrative elements like this as gameplay elements helps make the entire fight feel more cohesive and ‘settled in’ so to speak with the context of the world. I think one of the things that stuck with me so much about Artorias is just how effective his telegraphs are. They are pretty generous with a lot of leeway, but just quick enough to make them feel dangerous, frenetic, and challenging, while at the same time I never feel cheated whenever Artorias gets a good whack in against me (which he does. Frequently). That readability is really essential in making a good boss fight for an action game like this.

Artorias may bound into the air, do a flip, and bring down his sword onto the ground in a slam. For this flipping move you can once again see Artorias’s massive attack telegraphs which give the player ample time to react. This attack doesn’t actually do anything until Artorias has nearly hit the ground, and all that time he spends hanging in the air like he’s posing for a comic book cover is just fluff to telegraph the attack more effectively. Well, perhaps not fluff. It also serves a purpose to cut quite a striking scene. This incredible feat of acrobatics really sells Artorias as an inhuman swordsman. Dark Souls characters don’t really do this. Not usually, anyway. At their most nimble, the player character is a mildly athletic normal person. These sorts of insane stunts really set Artorias and what he’s capable of apart. It reinforces that you’re fighting a monster. Another fun design aspect of this attack is how it can chain into itself. Artorias will do this same attack one to three times in a row, requiring the player to dodge them with correct timing subsequently. It’s one of the best tools in Artorias’s kit for enforcing mastery of the Dark Souls dodge roll. Because the difference in Artorias’s body language between repeated flipping strikes and returning to a neutral position can be very subtle, it’s also an excellent tool for enforcing mastery of observation. To know how to react, one has to perceive their opponent very closely, which can be very challenging with all the moving information in a game like this.

Once again, we can see Artorias’s animation noticeably slow down just as he reaches the apex of his jump to punctuate the attack. Everything the player needs to know is communicated clearly.

The aforementioned flipping attack as well as a long-reaching vertical strike Artorias may interweave in his grounded combat both share the properties of being overhead attacks. Because of how overhead attacks behave in Dark Souls it is probable, depending on the player’s spacing relative to Artorias, that the attacks will go over the player’s shield and hit them regardless of a block, making shields less viable for these specific sorts of attacks unless spacing is well managed. So, these overheads enforce a level of skill in fine spacing – you want these overheads to tip your shield so they do not overreach you. The other option is to engage in at least some dodging, which fits with this fight’s goals of demanding mastery of numerous game mechanics. Another of those mechanics is the stamina meter, essentially a hard limiter on how often a player can block or dodge. If either defensive option is abused, stamina will be drained for a moment and the player will be unable to defend. When Artorias is in his aggressive state, he keeps up the pressure. If defending is done without forethought, stamina will be quickly drained and the player will likely take damage. Managing stamina in concert with your defensive options is another skill demanded of the player here.

Artorias has a stabbing thrust attack with a unique property- it hits twice, and it hits hard. Blocking Artorias with a shield is a plenty viable strategy. Shields are in fact very powerful in the first Dark Souls. This stab move, if taken full-on with a shield, however, may barrel through your stamina, breaking the player’s block and damaging them. Badly. Having your shield stance broken means entering one of several states the game considers to be off-balance, where combatants are vulnerable to bonus damage. The Artorias fight seems to be specifically tailored to ensure a player never relies too heavily on one strategy. To beat Artorias you have to be adaptable, and have at least a cursory understanding of a variety of Dark Souls‘ many combat mechanics, not just one or two.

One of the most devastating attacks in this boss’s arsenal is his leaping stab. Generally I find there are two main kinds of attack telegraphs in action games. There are the momentary tells, which flow directly into the attack they are telegraphing. Think a sword pulling back just before it comes down in one smooth motion. Then, there are the “hey heads up, I’m gonna hit ya!” telegraphs that are more like an ambulance siren alerting you to get the heck out the way, because something is coming. Artorias’s leaping stab is the latter kind. In these situations the game wants you to know that something is about to happen, and you need to be ready to follow up on that knowledge. With this kind of telegraph, you’ll know its coming well ahead of the attack. Designing an attack this way helps build variety in an enemy’s moveset and how the player paces themselves. It also allows the enemy to have an extraordinarily dangerous move that does not feel cheap because it is so forewarned. Artorias will howl at you before leaping into the air from a great distance and slamming his sword down in a stab. Sprinkling in these massively damaging yet easily nullified attacks is a good way to convey the danger and power of your boss without making it feel unfair. This attack also reinforces precision in one’s dodging and spacing, as dodging directly away from the landing site of the attack, toward the camera, is a good way to get stabbed, while lateral dodging, or even dodging towards Artorias’s starting position is much safer.

“AAARRROOOGH” – Sir Artorias D. Abysswalker, Esquire

Artorias is not a multi-phase fight, meaning he does not employ new strategies or abilities, for the most part, against the player throughout the fight. Fighting Artorias is as straightforward as it gets. He does have one last trick he might employ once he’s sustained a decent bit of damage, though. What I often affectionately call his ‘super saiyan power-up’ is an ability where he’ll stand perfectly still while gathering a cloud of menacing darkness around him. Cleverly, this makes boss staggering a central mechanic of the fight, whereas in most other boss fights throughout Dark Souls and throughout the series, even, it is a secondary concern, at best. Enemies in Dark Souls take an invisible stagger value or poise damage in addition to health damage when struck by the player. It represents the force being applied to an enemy’s stance and it’s pretty intuitive- a giant battle axe will inflict more stagger than a rapier. Once a minimum threshold of this stagger value has been reached in a short enough time, the enemy stumbles. Most enemies stagger on every strike. Larger ones tend to be able to shrug off a few hits. Bosses will often require a number of strikes to feel the pain and react. The only way to stop Artorias’s accumulation of power is to stagger him. Fail to do so and you’ll not only be caught up in a damaging explosion of darkness if you’re too close, but you’ll also have to deal with an empowered Artorias capable of decimating health and shields alike with his sword for some time. It creates an interesting dilemma of risk and reward. Do you attack Artorias while he refuses to fight back in the hopes you can stop his empowerment? Or do you take the down time to heal and hope you can dodge his empowered assault later? It demands the player make a snap calculation as to whether they can stagger Artorias in the short window they have to do so, while also making Artorias an even more terrifying opponent.

This… is to go… even further… BEYOND

Now I’d like to briefly go over some of the narrative elements of this boss fight. Any game with a narrative that also has bosses will naturally inject some sort of story into those boss fights. Gameplay is storytelling, after all, so there’s some things worth pointing out. As I stated earlier, Artorias’s sluggish and labored movements pull double-duty in making a satisfyingly readable opponent and selling Artorias as a dangerous, wild monster-warrior not in full control of his faculties. He moves almost like a puppet on invisible strings, with his head leading him where he goes, his limbs dragging behind. The sword is animated to depict its incredible weight, which also informs the shape his attacks take. The sheer might of his heavy strikes, their ability to tear through defenses, and his inhuman acrobatics shores up Artorias as a legendary divine knight. Several of his attacks, especially his spinning horizontal strikes, are very reminiscent of his wolf companion Sif, another boss in Dark Souls. Sif would eventually take up Artorias’s sword, so it’s natural Sif learned to wield it by observing their master. The darkened knight’s volatile, mindless state implies the tragic fate of this hero, and his fall to darkness. Dark Souls is also well known for its environmental storytelling so I’ll indulge a bit and point out a fun detail that can be gleaned about this Artorias from the environment. Elsewhere, it is noted that Artorias is renowned as a legendary left-handed swordsman. You may notice Artorias fights the player with his right hand. Eventually it is discovered Artorias gave up his shield to defend Sif from the abyss. It stands to reason that before succumbing himself, Artorias tried to defend with his left arm, sword-in-hand, shattering all of its bones in the process. The now corrupted Artorias fights, hobbled, with his offhand wielding the sword, main hand a wobbly useless husk. As challenging as the Artorias fought in Dark Souls may be, he is but a shadow of his former self. What a glorious sight the fully capable Artorias must have been in his prime.

But did Artorias carry POCKET SAND in his glory days!?

So I obviously really really like this boss fight. It may be one of my all time favorites from any game. The design suggests a boss that is more straightforward than almost anything in the rest of Dark Souls. Even simple bosses like the early-game Taurus demon have some sort of twist or gimmick, but Artorias is fought in a big, round empty room. His tricks are not that tricky, his attacks are mostly what they all appear to be. It’s a drag-out fight where only one guy can walk away. Dodge and hit better than Artorias to win. It really pushes you to use all of your defensive options. With generous attack telegraphs, but tight windows between attacks in which Artorias is vulnerable, the fight makes knowledge of spacing, Artorias’s animations, and the timing of his attacks your greatest tools. It feels like the purest form of Dark Souls. No fat, just learn your opponent’s moves, learn how to deal with them, and execute well to win. That was the goal with Artorias, and even at this relatively early stage of the Dark Souls franchise he’s one of the stand-out examples of that sort of design. Future games will iterate liberally on what Artorias represents, to great effect, but good ol’ Arty will always be one of the most elegant of these ‘pure fighting’ Dark Souls boss fights. It’s also got some great narrative elements baked right into the gameplay. They really wanted to sell you on the mindless rage of this abyssal thing controlling a once great hero. The way he violently massacres a hapless mook in his intro cut-scene sets an excellent tone that the deranged flailing of his animations expertly follow up on.

Pictured: Me not hitting and dodging better than Artorias

Artorias is a microcosm of what Dark Souls wants to get out of you as a player – observation, spacial awareness, and reaction. Thinking while you’re fighting. No matter what approach you take, with whatever tools are at the player’s disposal, Artorias is prepared to respond with the tools at his disposal to ensure you’re awake, and know what you’re doing. He’s an end-game boss, so he’s tuned to be difficult, and a penultimate test of your mastery over the Dark Souls combat mechanics. Artorias also marks the culmination of a shift in boss design for Dark Souls and its various sister series that began with some of the later bosses in the previous game Demon’s Souls. From this point forward, the emphasis the Artorias fight places on in-the-moment decision making, close observation of the opponent’s tells, high-stakes reaction based gameplay, and mastery of the game’s defensive mechanics such as dodging and countering will become a cornerstone of the series, more so than even anything that had come before.

Knight Artorias came to stop this, but such a hero has nary a murmur of dark…